games104 作业记录
games104 作业记录
课程视频:https://www.bilibili.com/video/BV14r4y1p7tt
课程作业链接:课程作业_课程资料 - GAMES104
他人笔记:GAMES104CourseNote
windows
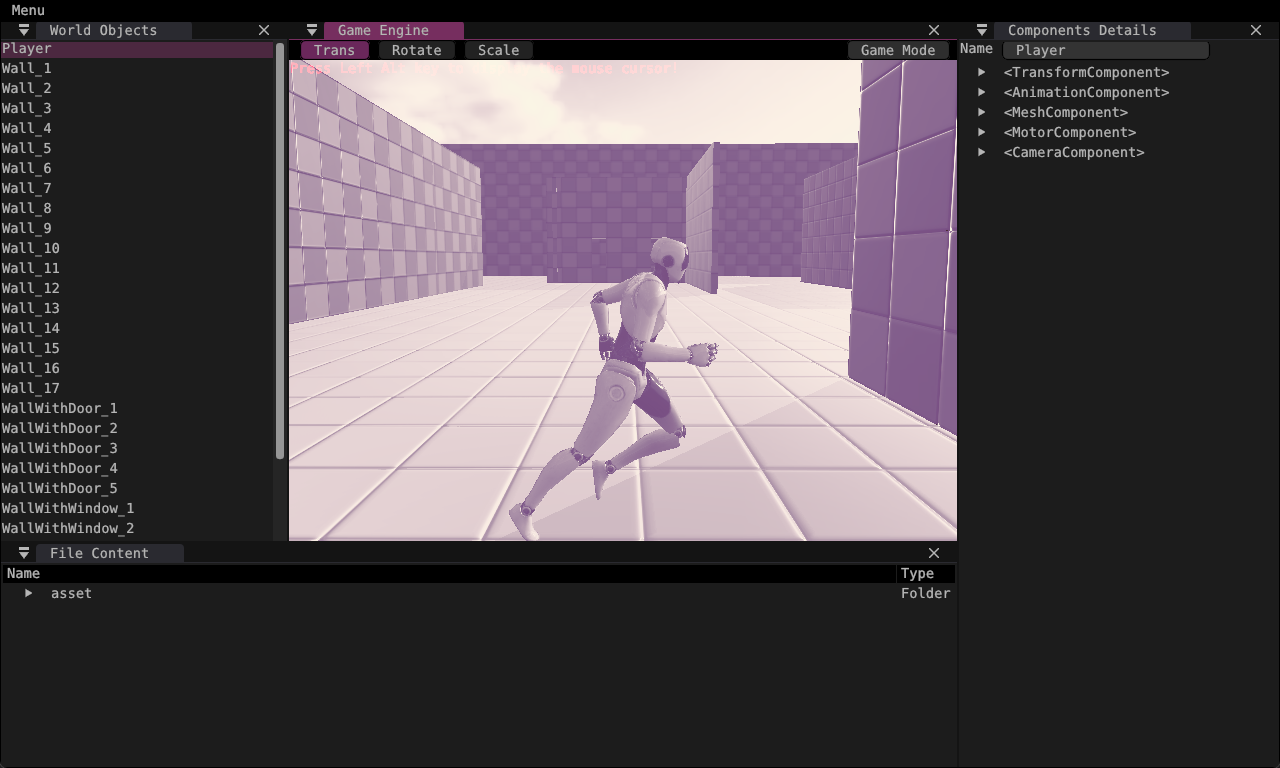
PA01:Build and Run Pilot Engine -win
按照教程直接运行即可
运行报错
后面再次运行,运行报错121个。。
games104 Piccolo的编译踩坑 - 知乎:未解决
重新拉取并按照教程,01也无法运行了,决定在ubuntu上做作业了
折腾一番ubuntu也不行
现在换个电脑,不用自己的win11了,用实验室台式机win10,哈哈哈(疯了
失败,不做啦sb
en? 这次试着打开Pilot而不是Piccolo,运行起来了??卧槽%&¥#@#
pa01写的piccolo啊卧槽
换成自己电脑运行看看,G,编译只编译出来piccolo,make报错,不管了,打开piccolo
bug,按照下面解决
Bug Report · Issue #490 · BoomingTech/Piccolo
终于又跑起来了,运行的main,再试试pa01,打开01
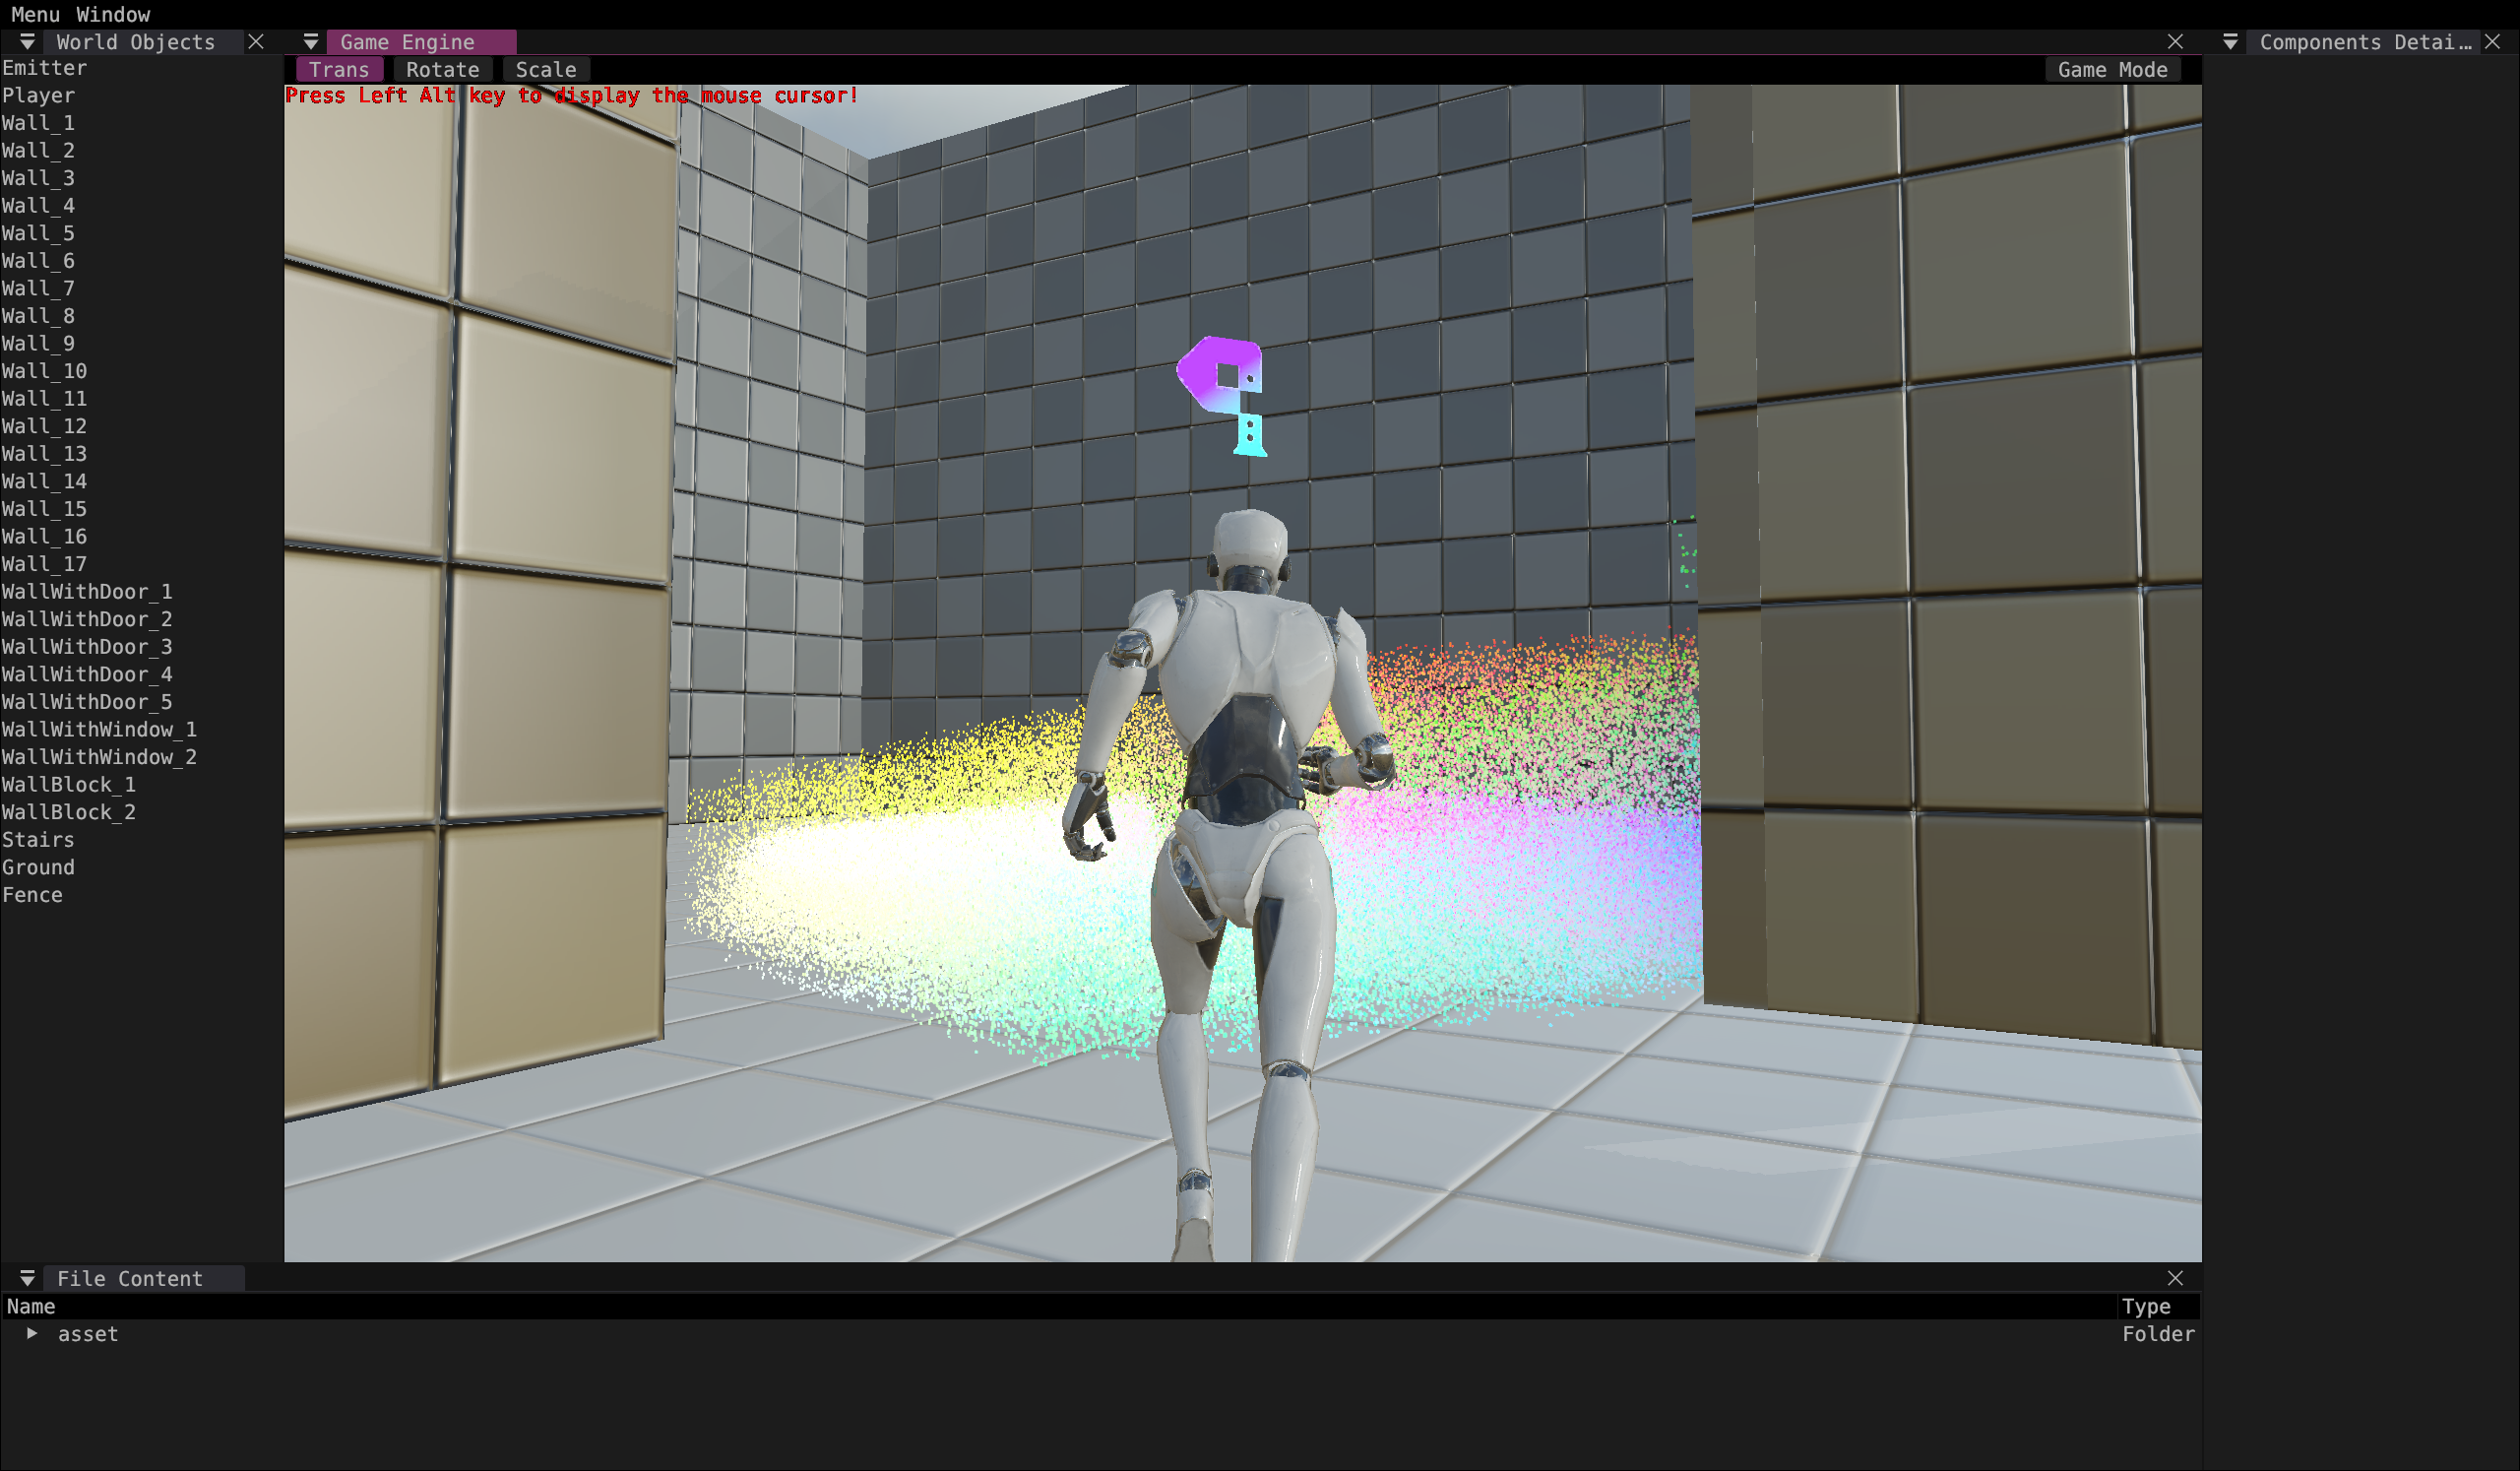
有piccolo和pilot,运行pilot,成功!
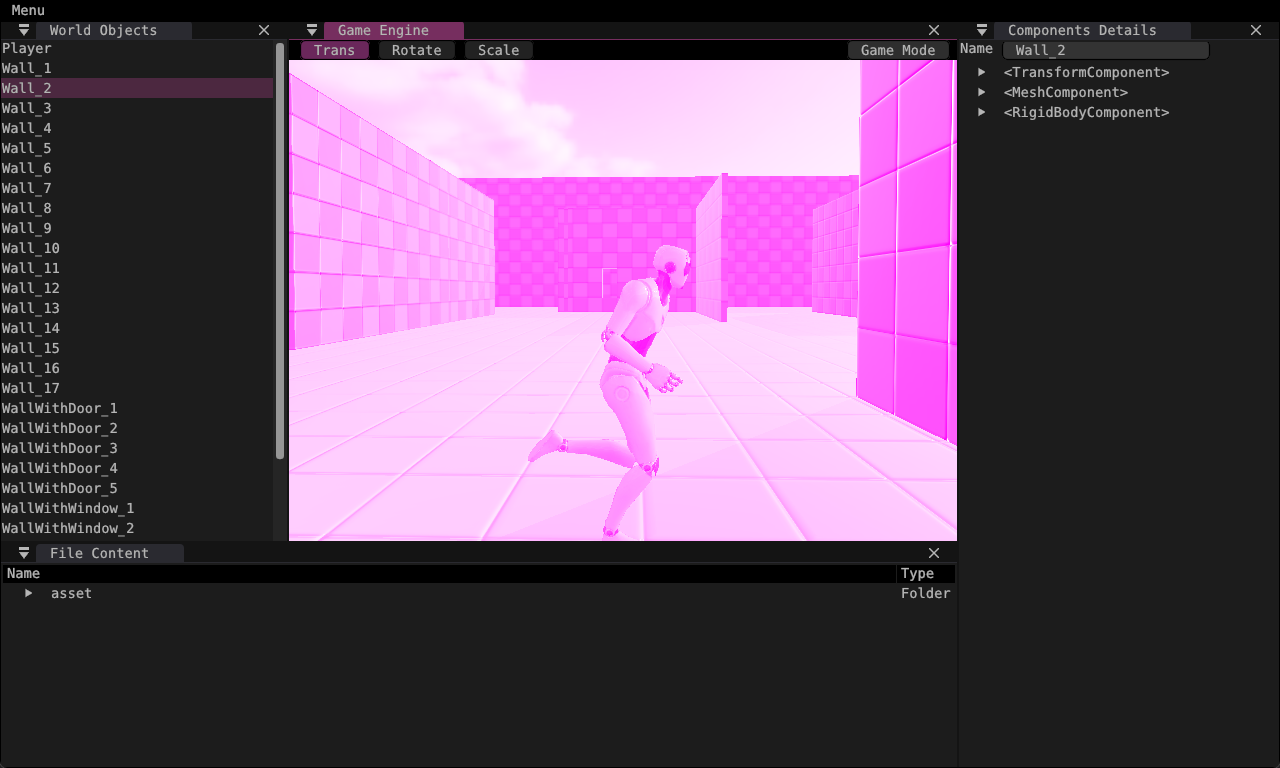
PA02:作业2 小试图形渲染 -win
color grading
拉取代码切换分支
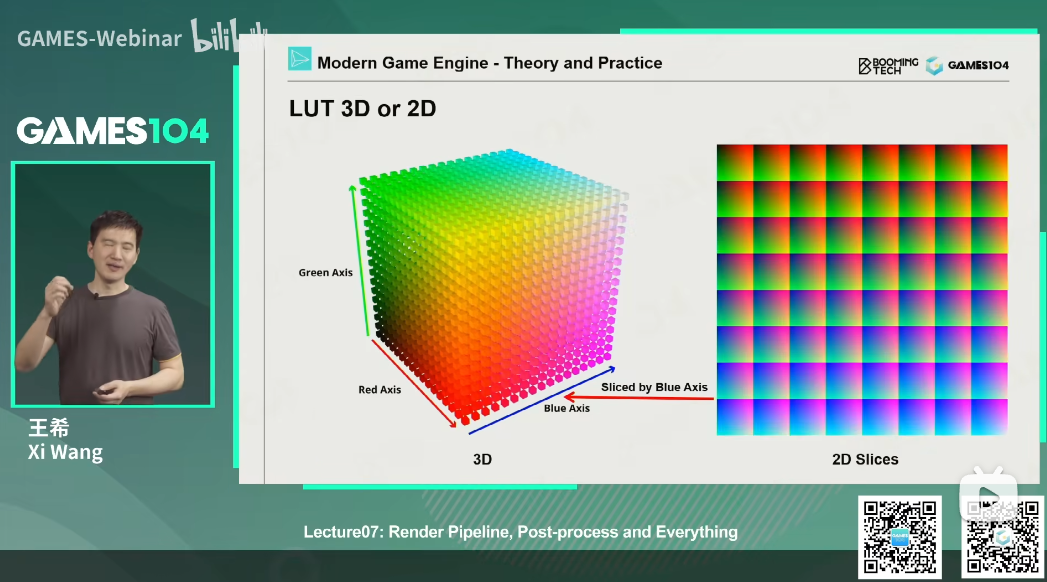
根据课程上讲的,再查看提供的lut图片,作业pdf里面没说
那就确认根据蓝色分的片吧

首先根据图片size确认蓝色分了几个片,再根据rgb值中的蓝色大小定位到需要插值的两个片
代码如下
1
2
3
4
5
6
7
8
9
10
11
12
13
14
15
16
17
18
19
| void main() {
highp ivec2 lut_tex_size = textureSize(color_grading_lut_texture_sampler, 0);
highp float _COLORS = float(lut_tex_size.y);
highp float _Nums = float(lut_tex_size.x) / _COLORS;
highp vec4 color = subpassLoad(in_color).rgba;
highp float blue_index = color.b * _Nums / 255.0;
highp float green_index = color.g / 255.0;
highp float red_index = color.r / 255.0;
highp vec2 uv_0 = vec2(floor(blue_index + 1.0) + green_index, red_index);
highp vec2 uv_1 = vec2(floor(blue_index) + green_index, red_index);
highp vec4 color_sample_0 = texture(color_grading_lut_texture_sampler, uv_0);
highp vec4 color_sample_1 = texture(color_grading_lut_texture_sampler, uv_1);
out_color = mix(color_sample_0, color_sample_1, fract(1.0 + blue_index - floor(blue_index)));
// out_color = color;
}
|
跑出来很奇怪,估计哪里有问题
啊,忘了rgba是【0,1】范围而不是【0-255】
并且根据网上资料发现lut 【0,0】在左上角,red green犯了,fix bug
1
2
3
4
5
6
7
8
9
10
11
12
13
14
15
16
17
18
19
| void main() {
highp ivec2 lut_tex_size = textureSize(color_grading_lut_texture_sampler, 0);
highp float _COLORS = float(lut_tex_size.y);
highp float _Nums = float(lut_tex_size.x) / _COLORS;
highp vec4 color = subpassLoad(in_color).rgba;
highp float blue_index = color.b * _Nums;
highp float green_index = color.g;
highp float red_index = color.r;
highp vec2 uv_0 = vec2(floor(blue_index + 1.0) + red_index, green_index);
highp vec2 uv_1 = vec2(floor(blue_index) + red_index, green_index);
highp vec4 color_sample_0 = texture(color_grading_lut_texture_sampler, uv_0);
highp vec4 color_sample_1 = texture(color_grading_lut_texture_sampler, uv_1);
out_color = mix(color_sample_0, color_sample_1, fract(blue_index));
}
|
这下应该没问题了(其实还有,下面fix了
make lut
如何制作LUT贴图,并应用到unity中? - 知乎
参考教程制作了一个lut,修改运行,图片如下
想验证一下对不对,于是关闭color_grading跑一张
再放到ps里面跑一下,好像哪里不对啊,差别太大了
欸,您猜怎么着,图反了,我做的lut图如下,左下角【0,0】,反转一下

跑出来还是不对啊,原lut图跑跑试试
还是偏红,怀疑底图就有问题。。。好吧没有是代码有问题TAT
在计算uv x没有÷对应的_Nums,导致范围不对,以及mix(x,y,a)=x*(1-a)+y*a
1
2
3
4
5
6
7
8
9
10
11
12
13
14
15
16
17
18
| void main() {
highp ivec2 lut_tex_size = textureSize(color_grading_lut_texture_sampler, 0);
highp float _COLORS = float(lut_tex_size.y);
highp float _Nums = float(lut_tex_size.x) / _COLORS;
highp vec4 color = subpassLoad(in_color).rgba;
highp float blue_index = color.b * _Nums;
highp float green_index = color.g;
highp float red_index = color.r;
highp vec2 uv_0 = vec2((floor(blue_index) + red_index) / _Nums, green_index);
highp vec2 uv_1 = vec2((floor(blue_index + 1.0) + red_index) / _Nums, green_index);
highp vec4 color_sample_0 = texture(color_grading_lut_texture_sampler, uv_0);
highp vec4 color_sample_1 = texture(color_grading_lut_texture_sampler, uv_1);
out_color = mix(color_sample_0, color_sample_1, fract(blue_index));
}
|
再次画图,实在没搞懂既然错了,第一张怎么跑出来的(?

再跑一下自己的lut,成功!
pass:后处理
先看看color grading和tonemapping 相关代码
按照这两个先写一个myselfpass 的头文件声明和实现,先不改代码,暂时还看不懂(也没仔细看),直接copy color grading代码
再在shader文件夹下里面创建一个自己的myself_pass.frag
再看看代码,发现每个有一个自己的frag.h 再看文件内容,注释显示是自动生成的文件
猜测是shader代码生成的数组,copy color grading到myselfpass.frag,运行一下build_windows.bat
生成了color_grading_frag.h文件,生成的数组内容和color grading一致
1
2
3
4
5
| #include <color_grading_frag.h>
|
再去看代码,修改一下incluede为生成的myself_pass_frag.h
1
| #include <myself_pass_frag.h>
|
再看下面这段代码,是绑定vert frag shader的,看来上面猜测应该是对的
将frag shader的参数改成MYSELF_PASS_FRAG,如果要写vert估计也是一致的操作,生成对应的h文件,icnclude一下,修改对应参数数组
1
2
3
4
| VkShaderModule vert_shader_module =
PVulkanUtil::createShaderModule(m_p_vulkan_context->_device, POST_PROCESS_VERT);
VkShaderModule frag_shader_module =
PVulkanUtil::createShaderModule(m_p_vulkan_context->_device, MYSELF_PASS_FRAG);
|
今天先这样,明天再看看写啥pass效果
想实现一个阳光光晕效果 Lens Flare
先看看代码
在PMainCameraPass::setupDescriptorSetLayout()中,绑定了各种需要使用的layout、
在class PVulkanManager中加上声明
1
2
3
| PColorGradingPass m_color_grading_pass;
PToneMappingPass m_tone_mapping_pass;
PMySelfPass m_myself_pass;
|
在PMainCameraPass::draw中加上自己的myselfpass及其调用,还有drawforward也加上
1
2
3
4
5
6
7
8
9
10
11
12
13
14
15
16
17
18
19
20
21
22
23
24
| void PMainCameraPass::draw(PColorGradingPass& color_grading_pass,
PToneMappingPass& tone_mapping_pass,
PMySelfPass& myself_pass,
PUIPass& ui_pass,
PCombineUIPass& combine_ui_pass,
uint32_t current_swapchain_image_index,
void* ui_state)
{
...
m_p_vulkan_context->_vkCmdNextSubpass(m_command_info._current_command_buffer, VK_SUBPASS_CONTENTS_INLINE);
tone_mapping_pass.draw();
m_p_vulkan_context->_vkCmdNextSubpass(m_command_info._current_command_buffer, VK_SUBPASS_CONTENTS_INLINE);
myself_pass.draw();
m_p_vulkan_context->_vkCmdNextSubpass(m_command_info._current_command_buffer, VK_SUBPASS_CONTENTS_INLINE);
color_grading_pass.draw();
m_p_vulkan_context->_vkCmdNextSubpass(m_command_info._current_command_buffer, VK_SUBPASS_CONTENTS_INLINE);
...
}
|
好难看不懂了,先搁着吧
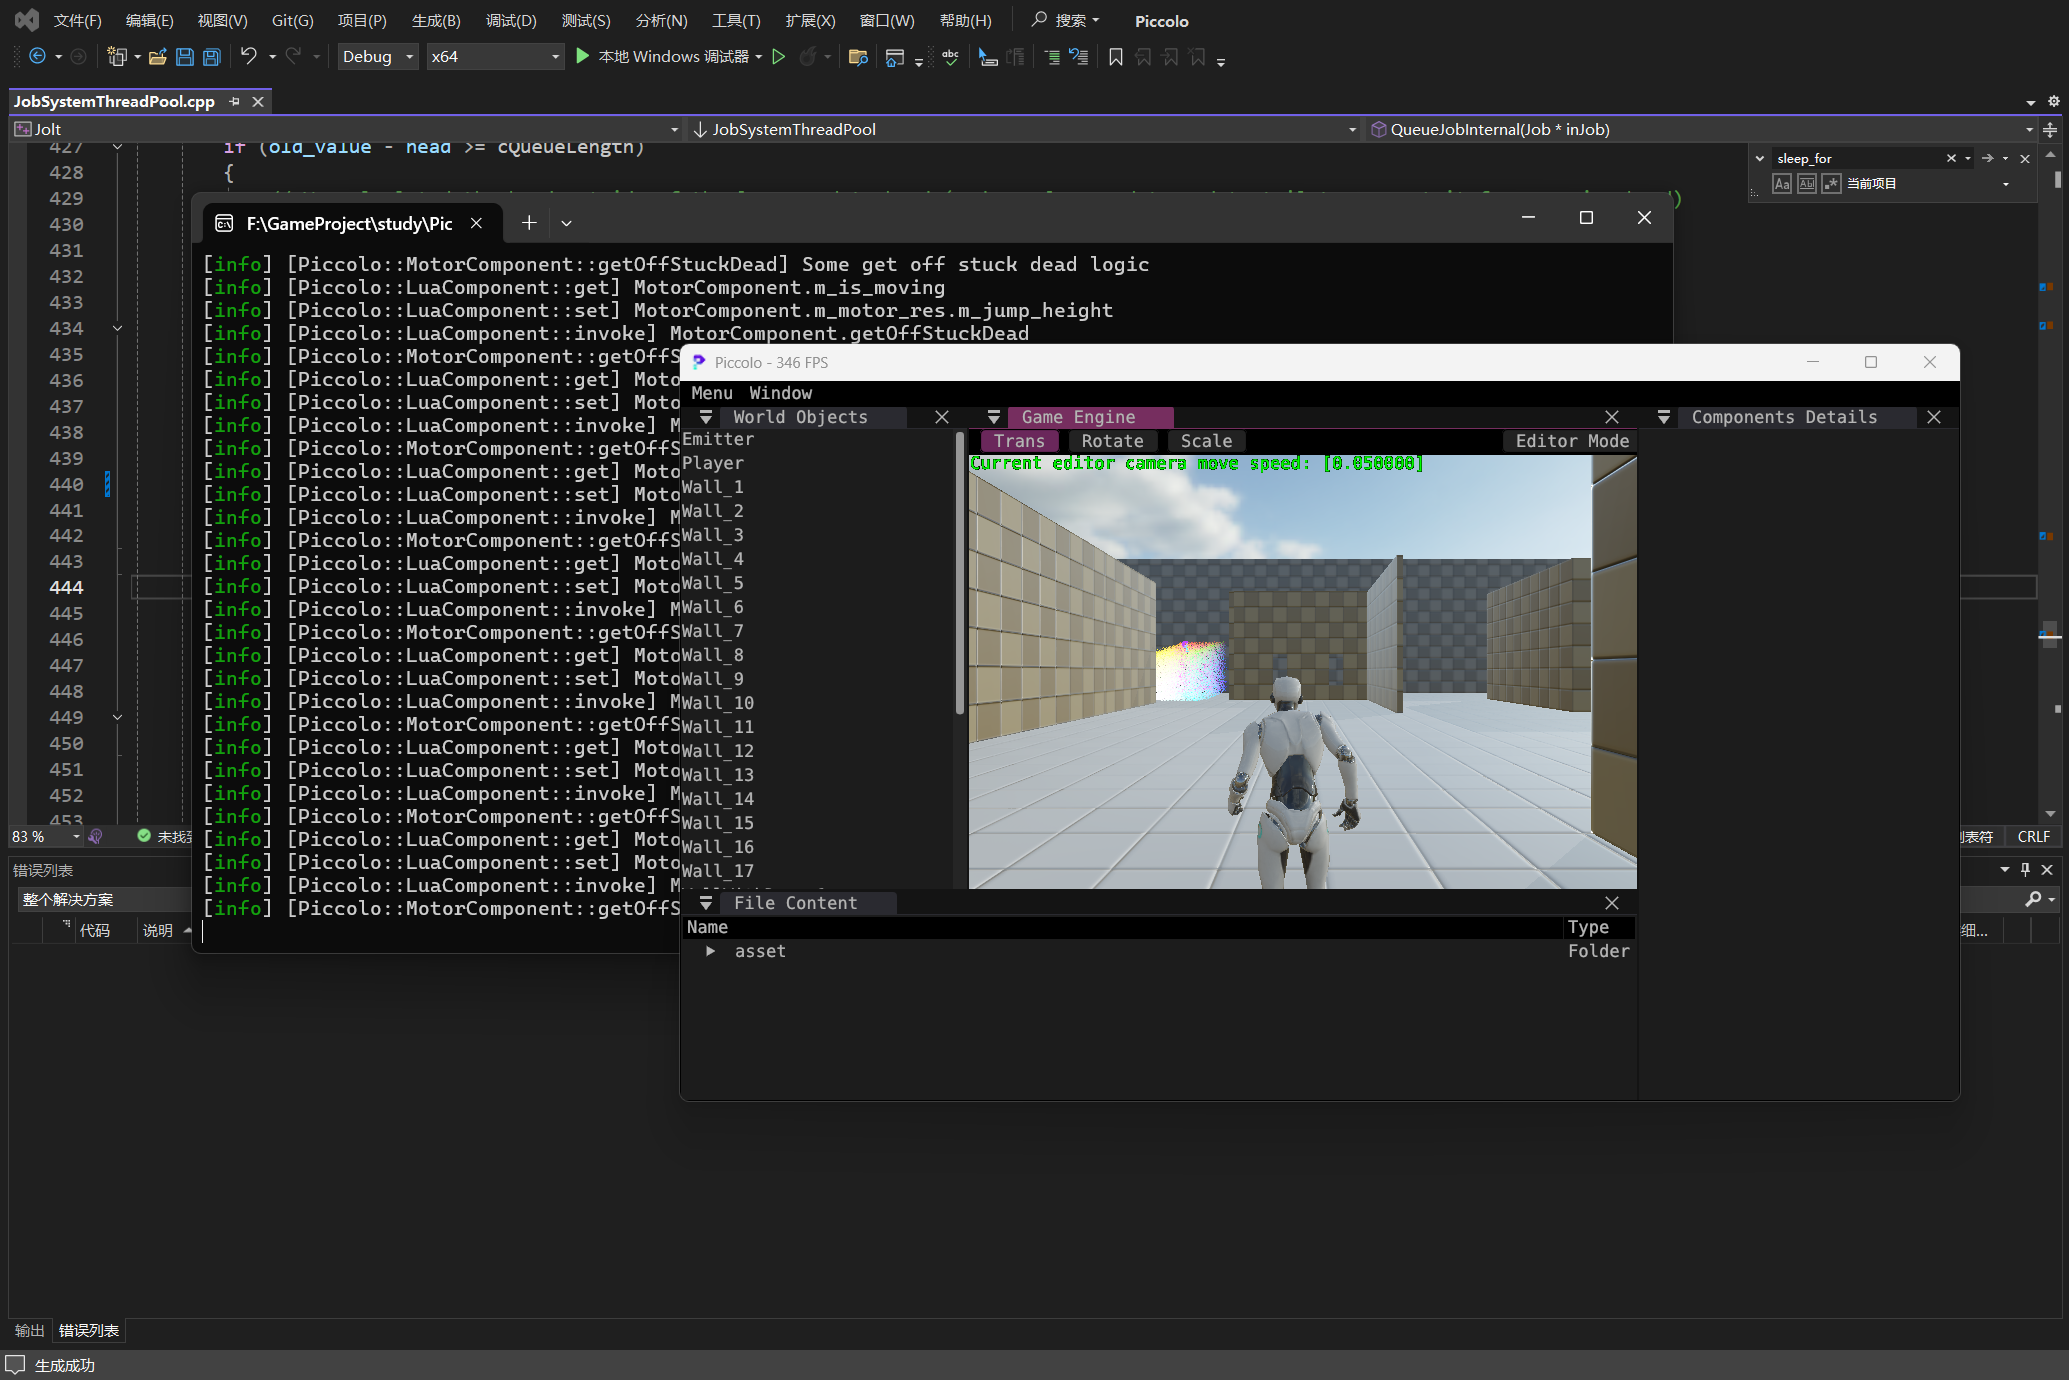
时隔好久重新来看,结果报错跑不起来了,仔细一看发现是自己的pass声明了没实现,阿巴阿巴
1
2
3
4
5
6
7
8
9
10
11
| PilotRuntime.lib(myself_pass.obj) : error LNK2019: 无法解析的外部符号 "public: void __cdecl Pilot::PMySelfPass::updateAfterFrame
bufferRecreate(struct VkImageView_T *)" (?updateAfterFramebufferRecreate@PMySelfPass@Pilot@@QEAAXPEAUVkImageView_T@@@Z)
,函数 "public: void __cdecl Pilot::PMySelfPass::initialize(struct VkRenderPass_T *,struct VkImageView_T *)" (?initialize@
PMySelfPass@Pilot@@QEAAXPEAUVkRenderPass_T@@PEAUVkImageView_T@@@Z) 中引用了该符号 [F:\GameProject\study\Piccolo\build\engine\s
ource\editor\PilotEditor.vcxproj]
PilotRuntime.lib(myself_pass.obj) : error LNK2019: 无法解析的外部符号 "private: void __cdecl Pilot::PMySelfPass::setupDescriptor
Set(void)" (?setupDescriptorSet@PMySelfPass@Pilot@@AEAAXXZ),函数 "public: void __cdecl Pilot::PMySelfPass::initialize(str
uct VkRenderPass_T *,struct VkImageView_T *)" (?initialize@PMySelfPass@Pilot@@QEAAXPEAUVkRenderPass_T@@PEAUVkImageView_
T@@@Z) 中引用了该符号 [F:\GameProject\study\Piccolo\build\engine\source\editor\PilotEditor.vcxproj]
F:\GameProject\study\Piccolo\build\engine\source\editor\Release\PilotEditor.exe : fatal error LNK1120: 2 个无法解析的外部命令 [F:
\GameProject\study\Piccolo\build\engine\source\editor\PilotEditor.vcxproj]
|
继续!看了源码分析视频后继续写了
还有在vulkan_passes.h加入自己的枚举 _main_camera_subpass_myself_pass
在main-camera.cpp 的setupRenderPass加上attachment和依赖等等。。
现在自己的shader还没有实现,实际上还是colors-grading的功能
运行,发现只有一次color-grading,使用render-doc查看,发现同视频一样,输入是原本的图片而不是color_grading_pass输出的图片
debug发现需要修改这个input和color attachment使用的缓存区,因为在color_grading_pass后面增加的,因此ui和combine_ui一并需要修改
同时还注意需要修改updateAfterFramebufferRecreate使用的input_attachment的正确性,在初始化和recreateSwapChain中均需要修改!
由于修改的代码较多就不放代码了,主要修改了以下文件,还修改了一下其他的文件,但很久以前改的了忘了)
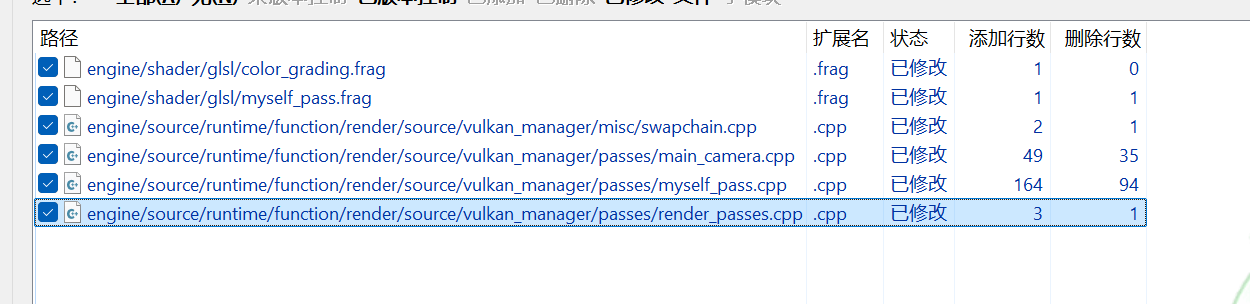
github:forestlyn/Piccolo at 6181b84bba4a7a0ac973f500ea3d1091f5a3c7f0
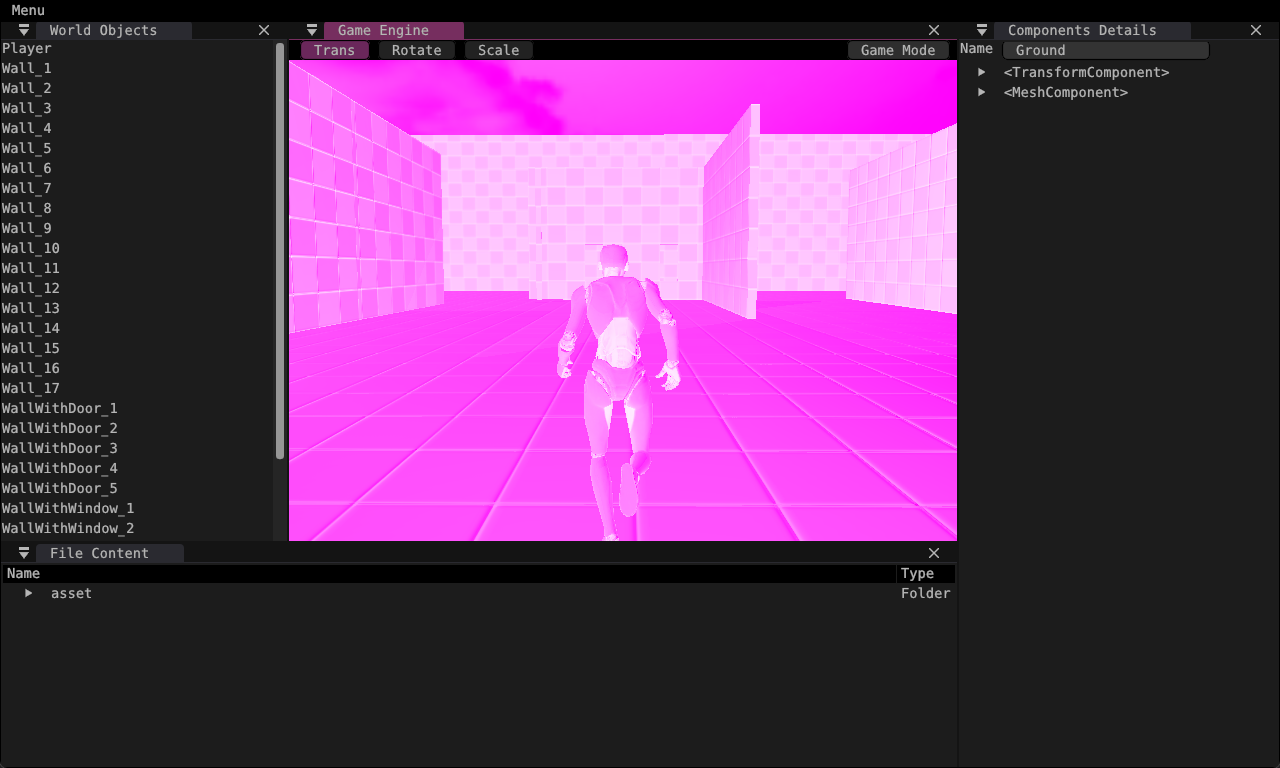
结果如下,经历了两次的color_grading
接下来终于到了实现自己的pass了。
研究了很久,发现复杂的不会,最后决定写个简单的,实现一个简单的FAXX
1
2
3
4
5
6
7
8
9
10
11
12
13
14
15
16
17
18
19
20
21
22
23
24
25
26
| #version 310 es
#extension GL_GOOGLE_include_directive : enable
#include "constants.h"
layout(input_attachment_index = 0, set = 0, binding = 0) uniform highp subpassInput in_color;
layout(location = 0) out highp vec4 outColor;
void main() {
highp vec4 center_color = subpassLoad(in_color);
highp vec3 color = center_color.rgb;
highp vec3 dx = dFdx(color);
highp vec3 dy = dFdy(color);
highp float edge = length(dx * dx + dy * dy);
highp float blend_factor = clamp(edge * 3.0, 0.0, 0.3);
outColor = vec4(color * (1.0 - blend_factor) + vec3(0.5) * blend_factor, 1.0);
}
|
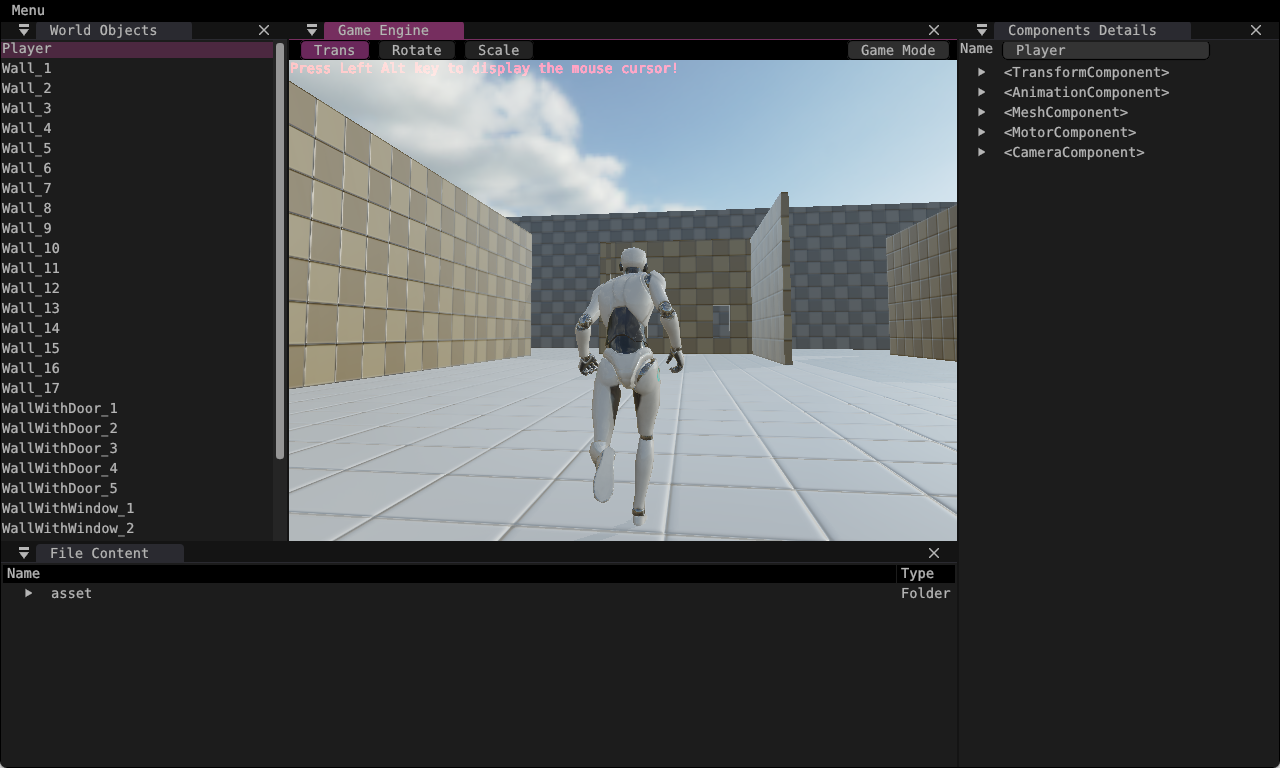
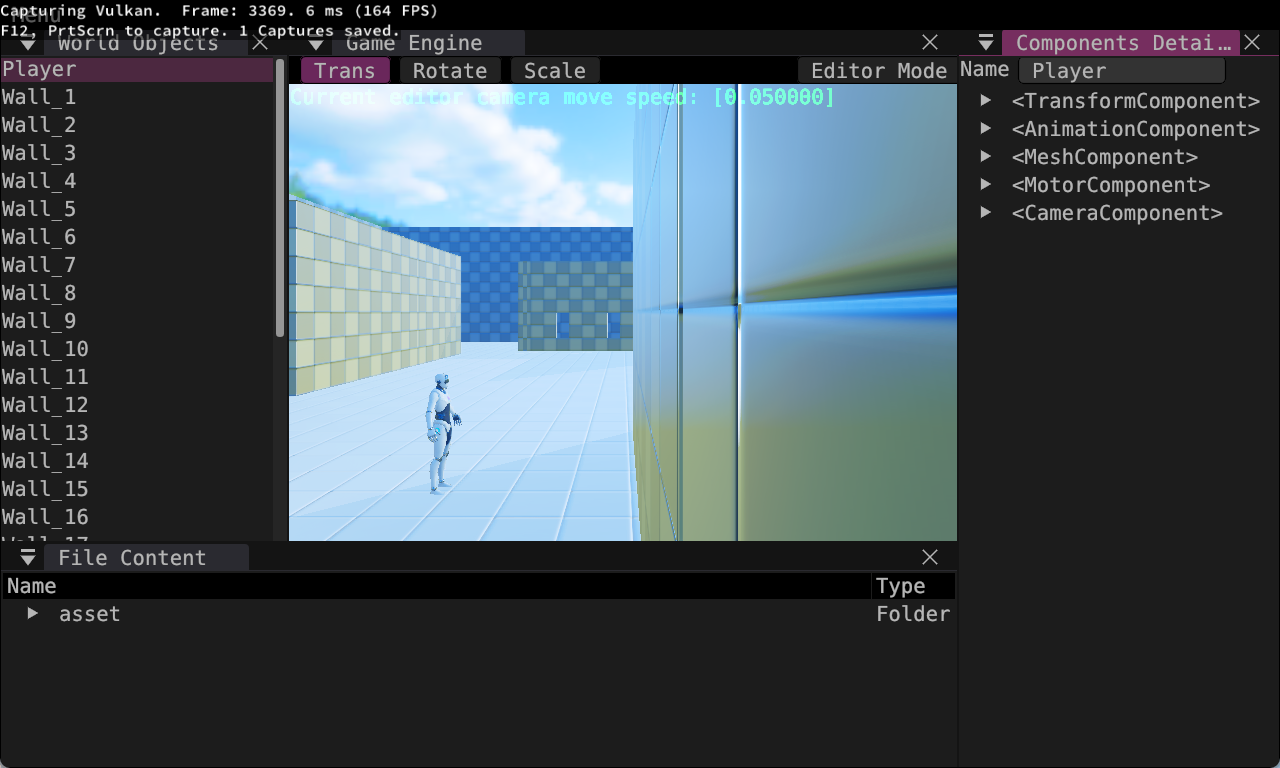
展示,FXAA前,边缘锐利
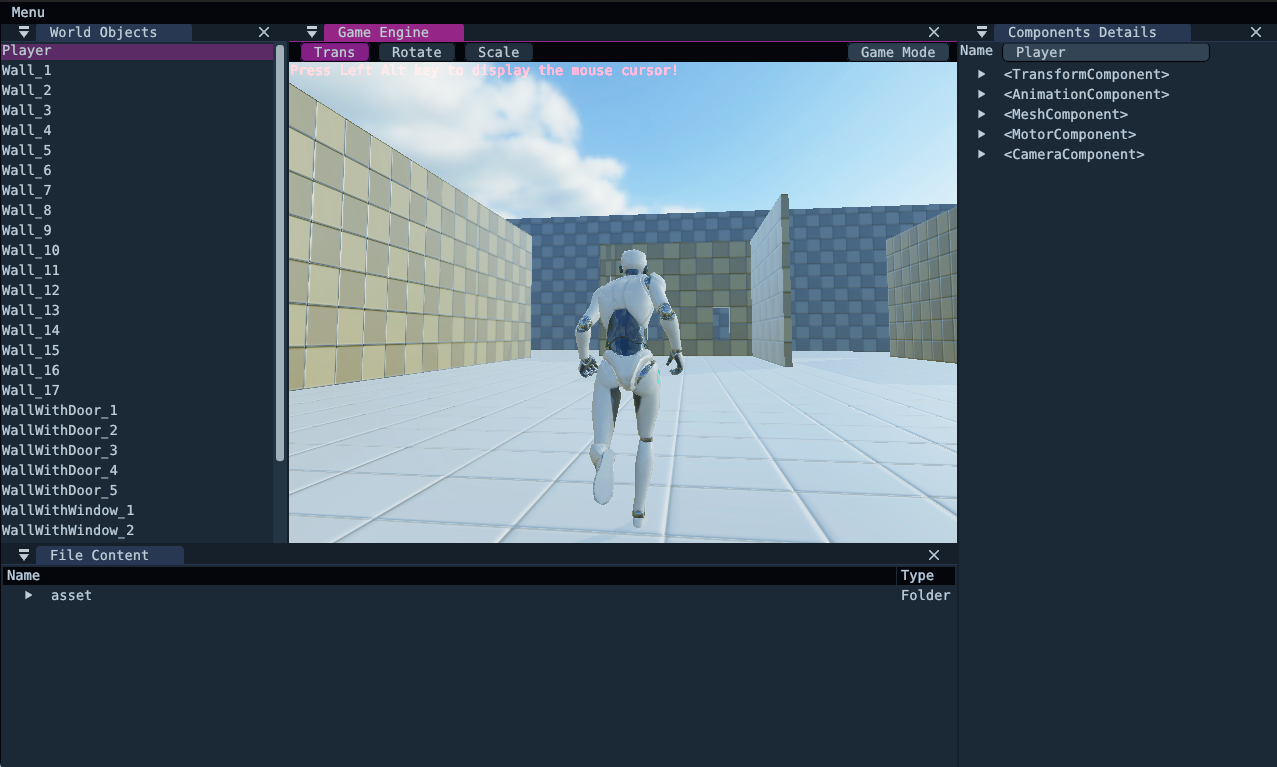
FAXX后,边缘没那么锐利了
ok,完成了!
github:forestlyn/Piccolo at 46c4e9734b25a5b1708d22cd10aa488e4a974e67
PA03:作业3 动画系统与物理系统
首先切换分支,运行build_windows.bat
出错
1
2
3
| F:\GameProject\study\Piccolo\engine\3rdparty\JoltPhysics\Jolt\Math\UVec4.h(24,9): error C2220: 以下警告被视为错误 [F:\GameProjec
t\study\Piccolo\build\engine\3rdparty\JoltPhysics\Build\Jolt.vcxproj]
(编译源文件“../../../../../engine/3rdparty/JoltPhysics/Jolt/pch.cpp”)
|
Bug Report · Issue #390 · BoomingTech/Piccolo 去除了/WX
同时修改this_thread::sleep_for(100us);报错
Bug Report · Issue #490 · BoomingTech/Piccolo
成功编译
Blend
实现如下,运行显然不正确
1
2
3
4
5
6
7
8
9
10
11
12
13
14
15
16
17
18
| void AnimationPose::blend(const AnimationPose& pose)
{
for (int i = 0; i < m_bone_poses.size(); i++)
{
auto& bone_trans_one = m_bone_poses[i];
const auto& bone_trans_two = pose.m_bone_poses[i];
float sum_weight = pose.m_weight.m_blend_weight[i] + m_weight.m_blend_weight[i];
if (sum_weight != 0)
{
float cur_weight = pose.m_weight.m_blend_weight[i] / sum_weight;
m_weight.m_blend_weight[i] = 1.0f - cur_weight;
bone_trans_one.m_position = bone_trans_one.m_position * m_weight.m_blend_weight[i] + cur_weight * bone_trans_two.m_position;
bone_trans_one.m_scale = bone_trans_one.m_scale * m_weight.m_blend_weight[i] + cur_weight * bone_trans_two.m_scale;
bone_trans_one.m_rotation = bone_trans_one.m_rotation * m_weight.m_blend_weight[i] + cur_weight * bone_trans_two.m_rotation;
}
}
}
|
修改
混合使用lerp 和 nLerp,并且nLerp使用最短路径
同时将m_weight.m_blend_weight[i] = 1.0f; 暂时没懂,但是这样设置后不抽抽了
1
2
3
4
5
6
7
8
9
10
11
12
13
14
15
16
17
18
| void AnimationPose::blend(const AnimationPose& pose)
{
for (int i = 0; i < m_bone_poses.size(); i++)
{
auto& bone_trans_one = m_bone_poses[i];
const auto& bone_trans_two = pose.m_bone_poses[i];
float sum_weight = pose.m_weight.m_blend_weight[i] + m_weight.m_blend_weight[i];
if (sum_weight != 0)
{
float cur_weight = pose.m_weight.m_blend_weight[i] / sum_weight;
m_weight.m_blend_weight[i] = 1.0f;
bone_trans_one.m_position = Vector3::lerp(bone_trans_one.m_position, bone_trans_two.m_position, cur_weight);
bone_trans_one.m_scale = Vector3::lerp(bone_trans_one.m_scale, bone_trans_two.m_scale, cur_weight);
bone_trans_one.m_rotation = Quaternion::nLerp(cur_weight, bone_trans_one.m_rotation, bone_trans_two.m_rotation, true);
}
}
}
|
根据AnimationComponent::blend内的这部分代码,可以推测出应当设置为sum_weight,保证混合后的权重,剩下pose权重加起来还是1
1
| m_weight.m_blend_weight[i] = sum_weight;
|
1
2
3
4
5
6
7
8
| for (int i = 1; i < blendStateData.m_clip_count; i++)
{
for (auto& pose : poses[i].m_weight.m_blend_weight)
{
pose = blend_state->m_blend_weight[i];
}
poses[0].blend(poses[i]);
}
|
最终代码为
1
2
3
4
5
6
7
8
9
10
11
12
13
14
15
16
17
18
| void AnimationPose::blend(const AnimationPose& pose)
{
for (int i = 0; i < m_bone_poses.size(); i++)
{
auto& bone_trans_one = m_bone_poses[i];
const auto& bone_trans_two = pose.m_bone_poses[i];
float sum_weight = pose.m_weight.m_blend_weight[i] + m_weight.m_blend_weight[i];
if (sum_weight != 0)
{
float cur_weight = pose.m_weight.m_blend_weight[i] / sum_weight;
m_weight.m_blend_weight[i] = sum_weight;
bone_trans_one.m_position = Vector3::lerp(bone_trans_one.m_position, bone_trans_two.m_position, cur_weight);
bone_trans_one.m_scale = Vector3::lerp(bone_trans_one.m_scale, bone_trans_two.m_scale, cur_weight);
bone_trans_one.m_rotation = Quaternion::nLerp(cur_weight, bone_trans_one.m_rotation, bone_trans_two.m_rotation, true);
}
}
}
|
状态机update
参考状态转换图直接实现,没什么好说的
1
2
3
4
5
6
7
8
9
10
11
12
13
14
15
16
17
18
19
20
21
22
23
24
25
26
27
28
29
30
31
32
33
34
35
36
37
38
39
40
41
42
43
44
45
46
47
48
49
50
51
52
53
54
55
56
57
58
59
60
61
62
63
64
65
66
67
68
69
70
71
72
73
74
75
76
77
78
79
80
81
82
| bool AnimationFSM::update(const json11::Json::object& signals)
{
States last_state = m_state;
bool is_clip_finish = tryGetBool(signals, "clip_finish", false);
bool is_jumping = tryGetBool(signals, "jumping", false);
float speed = tryGetFloat(signals, "speed", 0);
bool is_moving = speed > 0.01f;
bool start_walk_end = false;
switch (m_state)
{
case States::_idle:
if (is_jumping) {
m_state = States::_jump_start_from_idle;
}
else if (is_moving) {
m_state = States::_walk_start;
}
break;
case States::_walk_start:
if (is_clip_finish) {
m_state = States::_walk_run;
}
break;
case States::_walk_run:
if (is_jumping) {
m_state = States::_jump_start_from_walk_run;
}
else if (start_walk_end && is_clip_finish) {
m_state = States::_walk_stop;
}
break;
case States::_walk_stop:
if (!is_moving && is_clip_finish) {
m_state = States::_idle;
}
break;
case States::_jump_start_from_idle:
if (is_clip_finish) {
m_state = States::_jump_loop_from_idle;
}
break;
case States::_jump_loop_from_idle:
if (!is_jumping) {
m_state = States::_jump_end_from_idle;
}
break;
case States::_jump_end_from_idle:
if (is_clip_finish) {
m_state = States::_idle;
}
break;
case States::_jump_start_from_walk_run:
if (is_clip_finish) {
m_state = States::_jump_loop_from_walk_run;
}
break;
case States::_jump_loop_from_walk_run:
if (!is_jumping) {
m_state = States::_jump_end_from_idle;
}
break;
case States::_jump_end_from_walk_run:
if (is_clip_finish) {
m_state = States::_walk_run;
}
break;
default:
break;
}
return last_state != m_state;
}
|
move
CharacterController::move 水平碰撞按照垂直方向实现即可
卡墙里时找一个不卡的位置设置为位置即可
25.10.5更新 这里不要使用physics_scene->sweep 长度horizontal_displacement,不然水平不移动就一直卡死了
最新代码:https://github.com/forestlyn/Piccolo/blob/1eb6f0f5b7a05c8049ed69f707f1c2380db956fd/engine/source/runtime/function/controller/character_controller.cpp
1
2
3
4
5
6
7
8
9
10
11
12
13
14
15
16
17
18
19
20
21
22
23
24
25
26
27
28
29
30
31
32
33
34
35
36
37
38
39
40
41
42
43
44
45
46
| // side pass
if (physics_scene->sweep(
m_rigidbody_shape,
world_transform.getMatrix(),
horizontal_direction,
horizontal_displacement.length(),
hits))
{
final_position += hits[0].hit_distance * horizontal_direction;
}
else
{
final_position += horizontal_displacement;
}
int flag = 0;
//当不在地面上并且卡住时,使用水平方向,前后探测到一个不卡的位置设置为最终位置
if (!m_is_touch_ground && physics_scene->isOverlap(m_rigidbody_shape, world_transform.getMatrix())) {
flag = 0;
for (int i = 1; i < 100; i++)
{
if (!physics_scene->sweep(
m_rigidbody_shape,
world_transform.getMatrix(),
-horizontal_direction,
horizontal_displacement.length() * i,
hits)) {
final_position -= horizontal_displacement * i;
break;
}
else if (!physics_scene->sweep(
m_rigidbody_shape,
world_transform.getMatrix(),
horizontal_direction,
horizontal_displacement.length() * i,
hits)) {
final_position += horizontal_displacement * i;
break;
}
flag += 1;
}
//std::string str = std::to_string(flag);
//if (flag == 99)
// LOG_INFO("ahha kazhule:");
//LOG_INFO("aa"+str);
}
|
实现沿着墙壁转向
思路:在前进方向上进行-90~+90的扫描,找到一个可以移动的方向移动
代码如下
25.10.5更新:https://github.com/forestlyn/Piccolo/blob/1eb6f0f5b7a05c8049ed69f707f1c2380db956fd/engine/source/runtime/function/controller/character_controller.cpp
1
2
3
4
5
6
7
8
9
10
11
12
13
14
15
16
17
18
19
20
21
22
23
24
25
26
27
28
29
30
31
32
33
34
35
36
37
38
39
40
41
42
43
44
45
46
47
48
49
50
51
52
53
54
55
56
57
58
59
60
61
62
63
64
65
66
67
68
69
70
71
72
73
74
75
76
77
78
79
80
81
82
83
84
85
86
87
88
89
90
91
92
93
94
95
96
97
98
99
100
101
102
103
104
105
106
107
108
109
110
111
112
113
114
115
116
117
118
119
120
121
122
123
124
125
126
127
128
129
130
131
132
133
134
135
136
137
138
139
140
141
142
143
144
145
| Vector3 CharacterController::move(const Vector3& current_position, const Vector3& displacement)
{
std::shared_ptr<PhysicsScene> physics_scene =
g_runtime_global_context.m_world_manager->getCurrentActivePhysicsScene().lock();
ASSERT(physics_scene);
std::vector<PhysicsHitInfo> hits;
Transform world_transform = Transform(
current_position + 0.1f * Vector3::UNIT_Z,
Quaternion::IDENTITY,
Vector3::UNIT_SCALE);
Vector3 vertical_displacement = displacement.z * Vector3::UNIT_Z;
Vector3 horizontal_displacement = Vector3(displacement.x, displacement.y, 0.f);
Vector3 vertical_direction = vertical_displacement.normalisedCopy();
Vector3 horizontal_direction = horizontal_displacement.normalisedCopy();
Vector3 final_position = current_position;
m_is_touch_ground = physics_scene->sweep(
m_rigidbody_shape,
world_transform.getMatrix(),
Vector3::NEGATIVE_UNIT_Z,
0.105f,
hits);
hits.clear();
world_transform.m_position -= 0.1f * Vector3::UNIT_Z;
int cantMove = 0;
if (physics_scene->sweep(
m_rigidbody_shape,
world_transform.getMatrix(),
vertical_direction,
vertical_displacement.length(),
hits))
{
final_position += hits[0].hit_distance * vertical_direction;
}
else
{
final_position += vertical_displacement;
}
hits.clear();
if (physics_scene->sweep(
m_rigidbody_shape,
world_transform.getMatrix(),
horizontal_direction,
horizontal_displacement.length(),
hits))
{
final_position += hits[0].hit_distance * horizontal_direction;
if (hits[0].hit_distance <= 0.01) {
cantMove += 1;
}
}
else
{
final_position += horizontal_displacement;
}
if (cantMove == 1)
{
float originx = horizontal_direction.x;
float originy = horizontal_direction.y;
for (int delta = 0; delta <= 90; delta++)
{
float x = cos(delta) * originx + sin(delta) * originy;
float y = cos(delta) * originy + sin(delta) * originx;
Vector3 revise_horizontal_direction = Vector3(x, y, 0);
if (!physics_scene->sweep(
m_rigidbody_shape,
world_transform.getMatrix(),
revise_horizontal_direction,
horizontal_displacement.length(),
hits))
{
final_position += revise_horizontal_direction * horizontal_displacement.length();
break;
}
x = cos(-delta) * originx + sin(-delta) * originy;
y = cos(-delta) * originy + sin(-delta) * originx;
revise_horizontal_direction = Vector3(x, y, 0);
if (!physics_scene->sweep(
m_rigidbody_shape,
world_transform.getMatrix(),
revise_horizontal_direction,
horizontal_displacement.length(),
hits))
{
final_position += revise_horizontal_direction * horizontal_displacement.length();
break;
}
}
}
int flag = 0;
if (!m_is_touch_ground && physics_scene->isOverlap(m_rigidbody_shape, world_transform.getMatrix())) {
flag = 0;
for (int i = 1; i < 100; i++)
{
if (!physics_scene->sweep(
m_rigidbody_shape,
world_transform.getMatrix(),
-horizontal_direction,
horizontal_displacement.length() * i,
hits)) {
final_position -= horizontal_displacement * i;
break;
}
else if (!physics_scene->sweep(
m_rigidbody_shape,
world_transform.getMatrix(),
horizontal_direction,
horizontal_displacement.length() * i,
hits)) {
final_position += horizontal_displacement * i;
break;
}
flag += 1;
}
}
return final_position;
}
}
|
但在移动的时候,经常卡顿,并且方向不太正确
经过debug,发现应该使用弧度制计算
并且delta <= Math_HALF_PI+ Math_fDeg2Rad,应当边界设置大一些,否则直接面向墙会卡住
1
2
3
4
5
6
7
8
9
10
11
12
13
14
15
16
17
18
19
20
21
22
23
24
25
26
27
28
29
30
31
32
33
34
35
36
37
38
39
|
if (cantMove == 1)
{
float originx = horizontal_direction.x;
float originy = horizontal_direction.y;
for (float delta = 0; delta <= Math_HALF_PI+ Math_fDeg2Rad; delta += Math_fDeg2Rad)
{
float x = cos(delta) * originx - sin(delta) * originy;
float y = cos(delta) * originy + sin(delta) * originx;
Vector3 revise_horizontal_direction = Vector3(x, y, 0).normalisedCopy();
if (!physics_scene->sweep(
m_rigidbody_shape,
world_transform.getMatrix(),
revise_horizontal_direction,
horizontal_displacement.length(),
hits))
{
final_position += revise_horizontal_direction * horizontal_displacement.length();
break;
}
x = cos(delta) * originx + sin(delta) * originy;
y = cos(delta) * originy - sin(delta) * originx;
revise_horizontal_direction = Vector3(x, y, 0).normalisedCopy();
if (!physics_scene->sweep(
m_rigidbody_shape,
world_transform.getMatrix(),
revise_horizontal_direction,
horizontal_displacement.length(),
hits))
{
final_position += revise_horizontal_direction * horizontal_displacement.length();
break;
}
}
}
|
增加上楼梯
看别人作业还有爬楼梯,发现自己没实现,实现一下
参考game engine 形状投影的应用
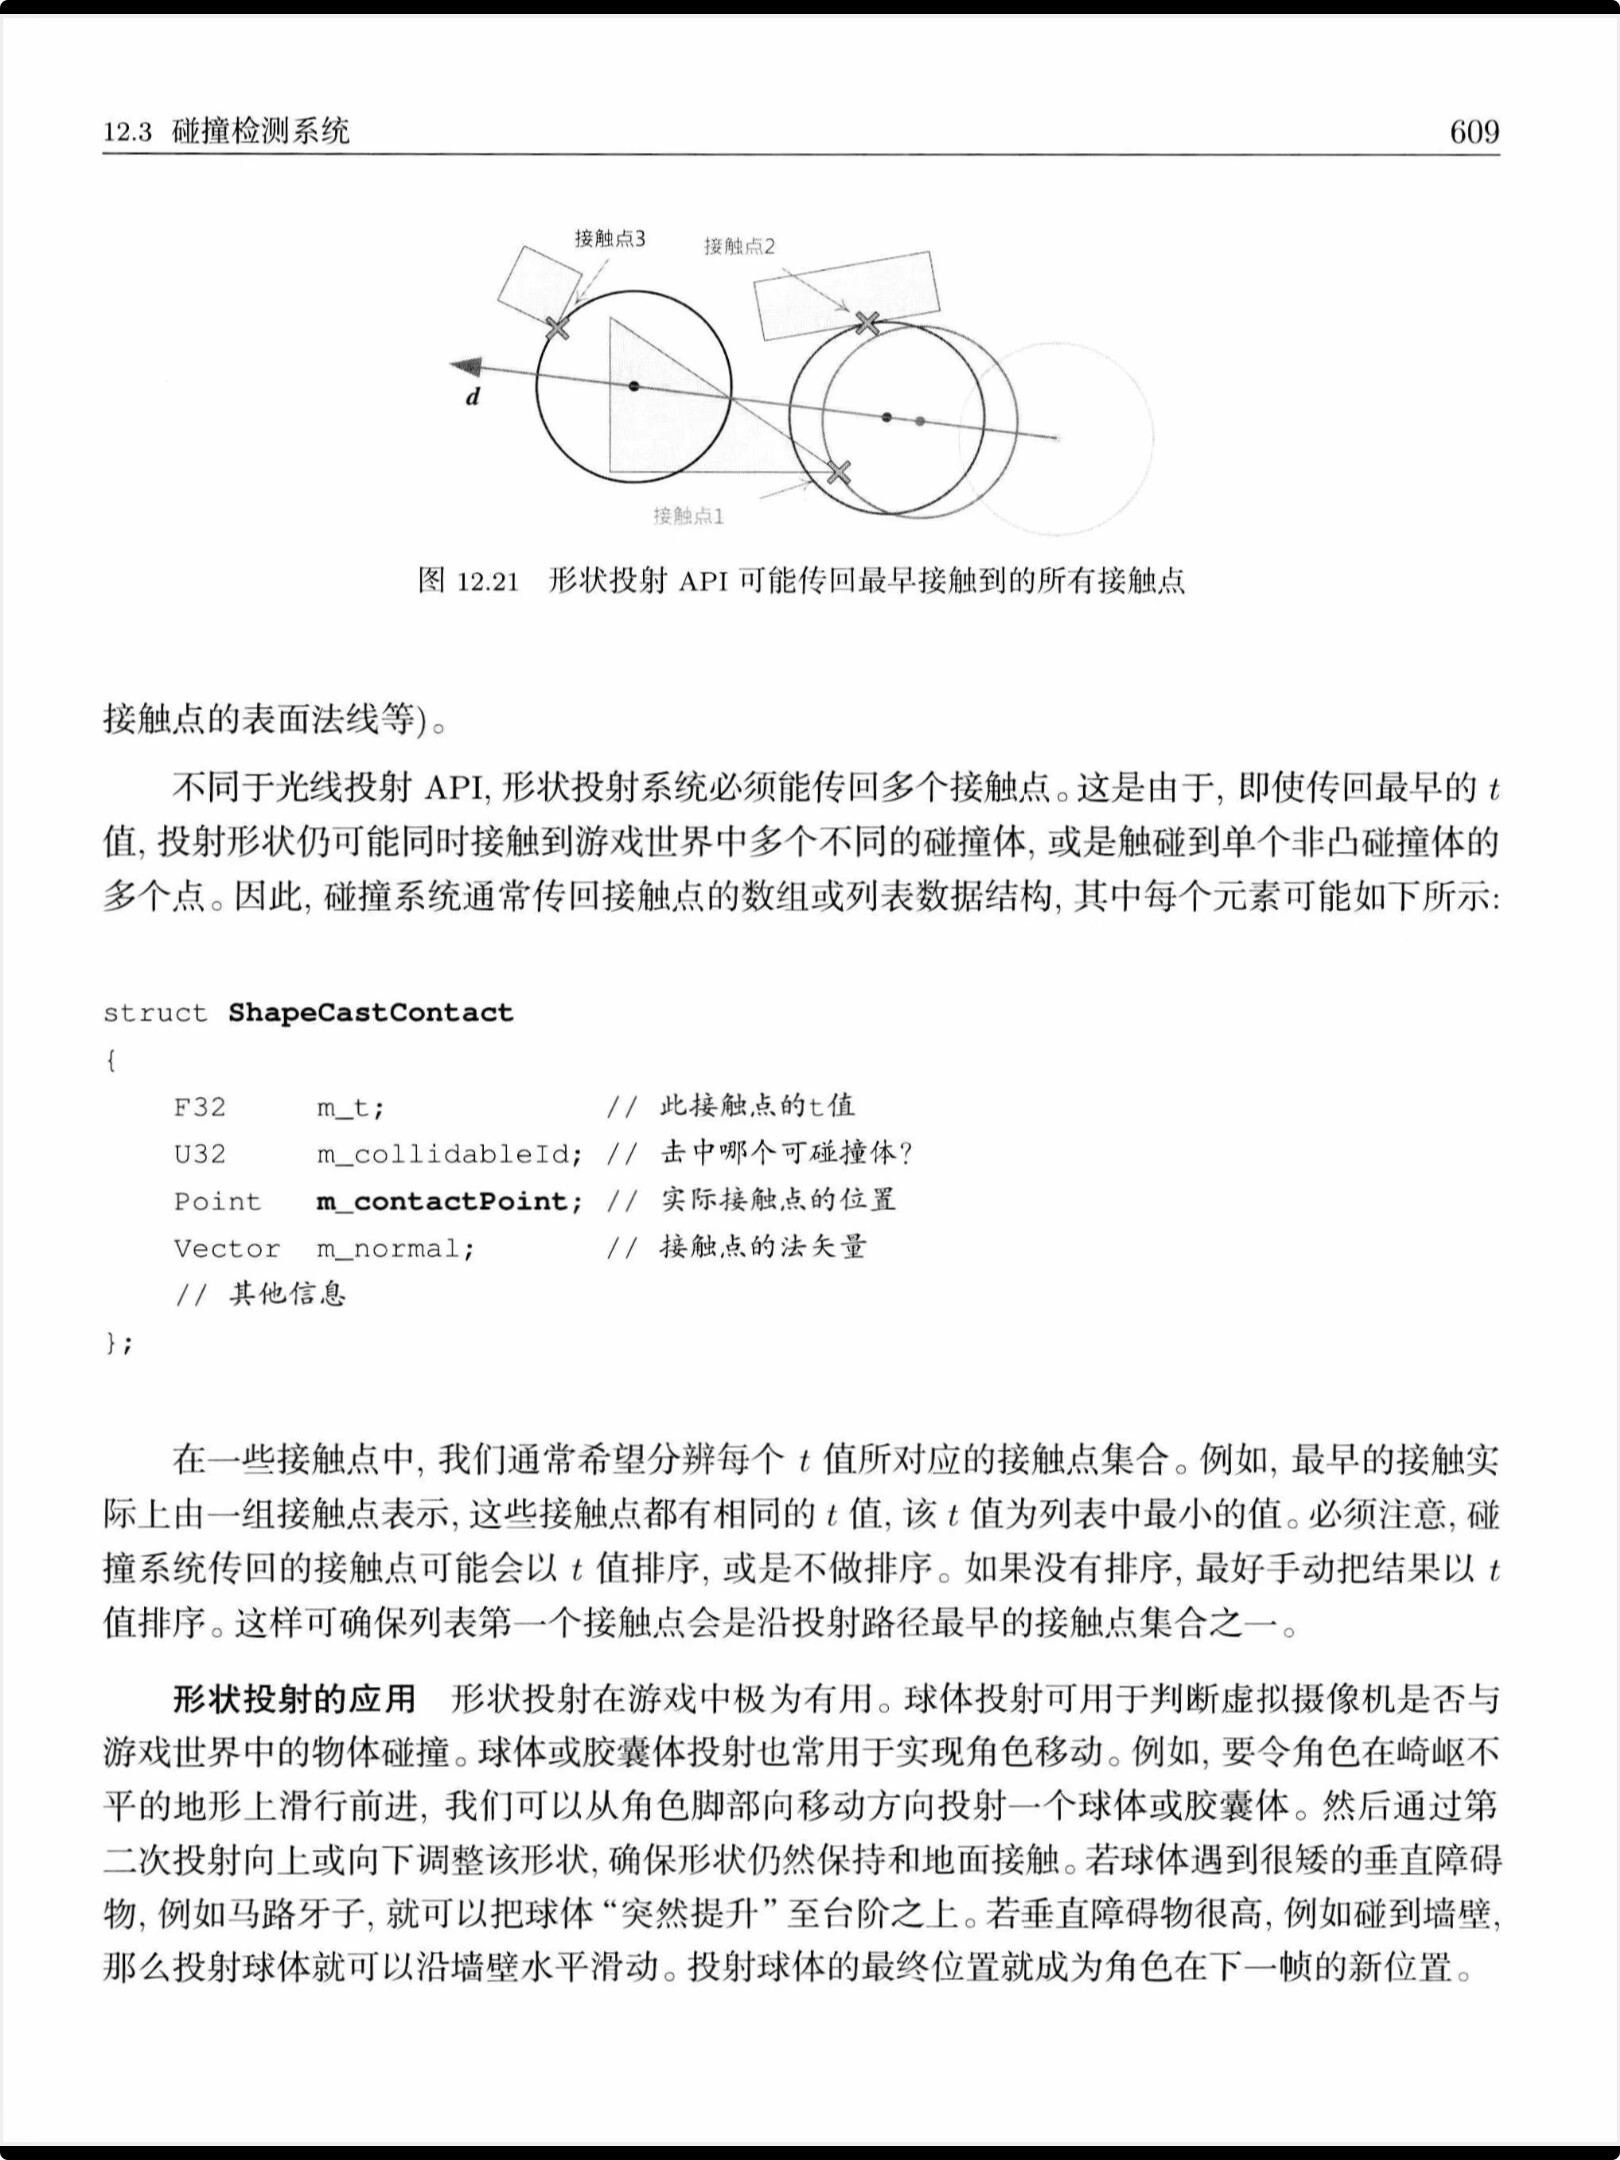
思路如下:
垂直方向不管
水平方向移动
- 如果平移过程中有障碍物,那么可能可以上楼梯,尝试上楼梯
- 先判断最大步高的情况,如果还是有障碍物重合,则不能上楼梯(其实不是很严谨
- 找到和地面相碰的最低点,然后从当前位置平移过去
- 不能上楼梯,则平移到障碍物边缘
- 如果平移距离过小,那么可以视为平移到不可跨越障碍物边缘了,准备沿着障碍物滑动,平移思路参考上面平移思路
- 如果平移过程没有障碍物,那么可能是下楼梯
- 那么直接寻找能否在范围内碰到地面,即下楼梯,当在地面上且竖直方向没有跳跃时,才考虑下楼梯,否则会跳不起来
- 找到和地面相碰的最低点,然后从当前位置平移过去
- 否则直接平移过去
其实整体实现是有问题的,但是没太想好怎么改,当下楼梯时人不在地面上,动画切换到了jump状态,其实不太正确
更新25.10.5
尝试使用土狼时间实现下楼梯不切换jump状态,还是失败
我靠,发现问题所在了,因为每一帧的移动都非常小,而写下落距离判断写大了。。导致没有下落,哎
https://github.com/forestlyn/Piccolo/blob/1eb6f0f5b7a05c8049ed69f707f1c2380db956fd/engine/source/runtime/function/controller/character_controller.cpp
PA04:作业4 引擎工具链中反射系统的应用
首先切换分支,运行build_windows.bat
出错
1
2
3
| F:\GameProject\study\Piccolo\engine\3rdparty\JoltPhysics\Jolt\Math\UVec4.h(24,9): error C2220: 以下警告被视为错误 [F:\GameProjec
t\study\Piccolo\build\engine\3rdparty\JoltPhysics\Build\Jolt.vcxproj]
(编译源文件“../../../../../engine/3rdparty/JoltPhysics/Jolt/pch.cpp”)
|
Bug Report · Issue #390 · BoomingTech/Piccolo 去除了/WX
同时修改this_thread::sleep_for(100us);报错
Bug Report · Issue #490 · BoomingTech/Piccolo
成功编译,打开piccolo.sln
首先看这个Piccolo引擎添加新功能指南 · BoomingTech/Piccolo Wiki
找到play_no_controlller.motor.json
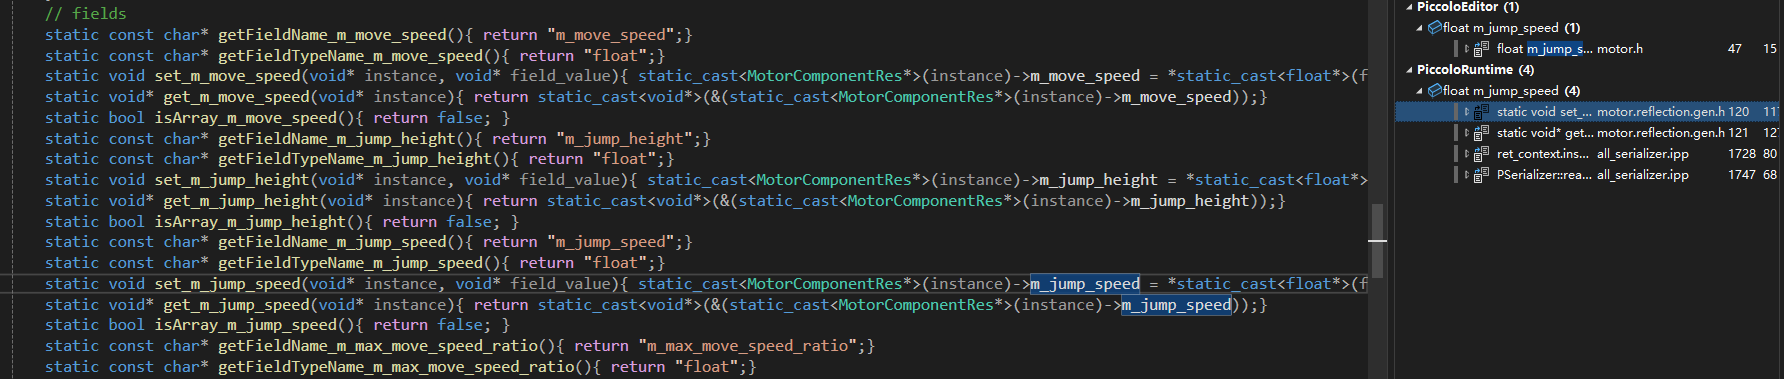
增加属性jump_speed
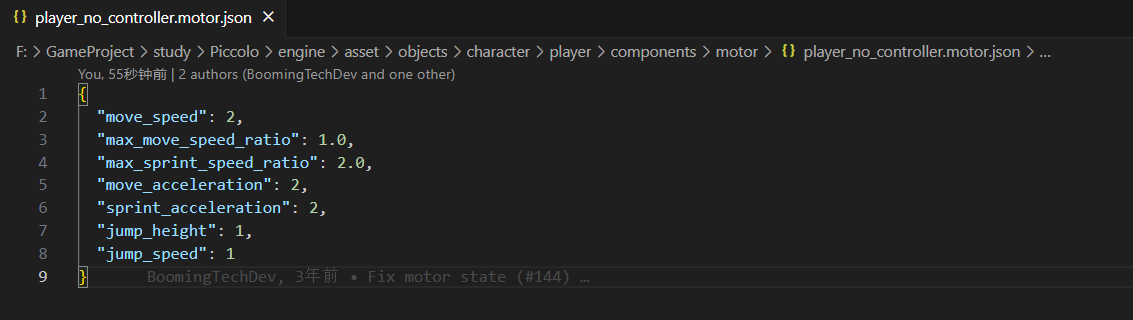
再在motor.h加入 float m_jump_speed{ 0.f };
1
2
3
4
5
6
7
8
9
10
11
12
13
14
15
16
17
18
19
20
| REFLECTION_TYPE(MotorComponentRes)
CLASS(MotorComponentRes, Fields)
{
REFLECTION_BODY(MotorComponentRes);
public:
MotorComponentRes() = default;
~MotorComponentRes();
float m_move_speed { 0.f};
float m_jump_height {0.f};
float m_jump_speed{ 0.f };
float m_max_move_speed_ratio { 0.f};
float m_max_sprint_speed_ratio { 0.f};
float m_move_acceleration {0.f};
float m_sprint_acceleration { 0.f};
Reflection::ReflectionPtr<ControllerConfig> m_controller_config;
};
|
这时候运行可以看到面板上有了m_jump_speed,但是赋值不对
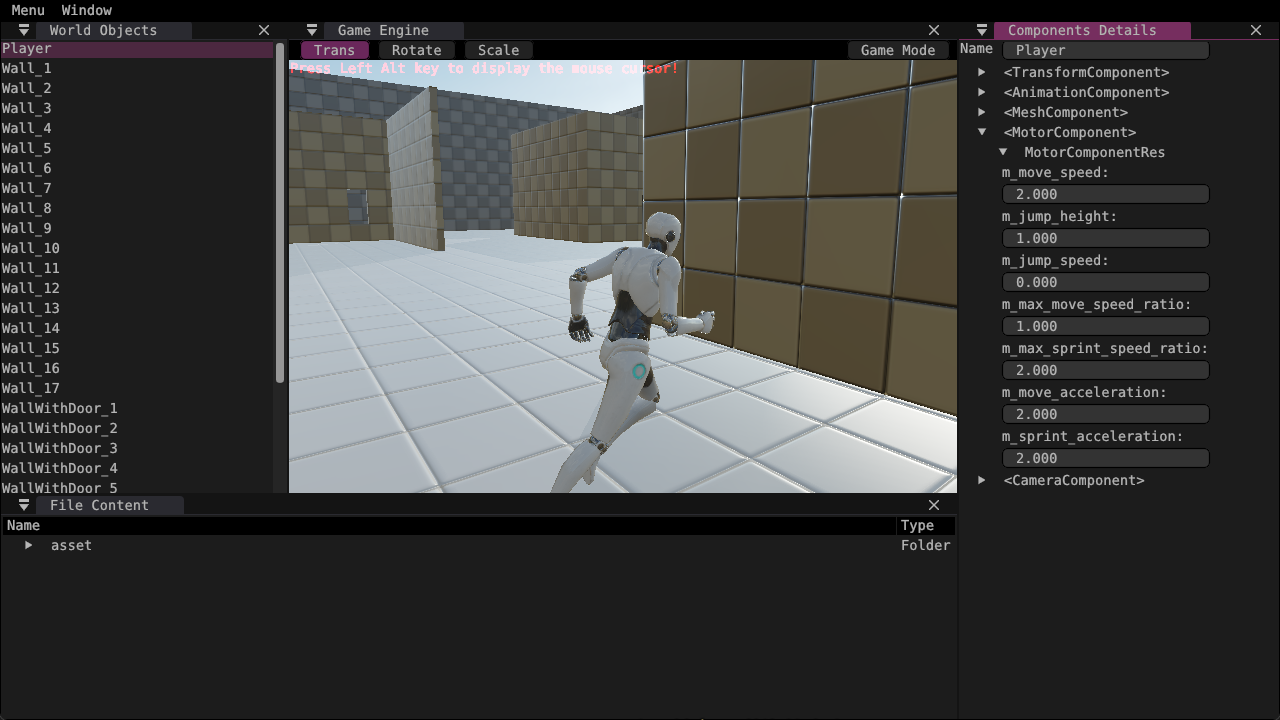
重新运行build_windows.bat,再次运行还是如此,奇怪,生成赋值代码等都有啊
关掉vs,重新运行bat,再打开运行,还是如此,怀疑读的不是这个文件,修改一下内容再次运行
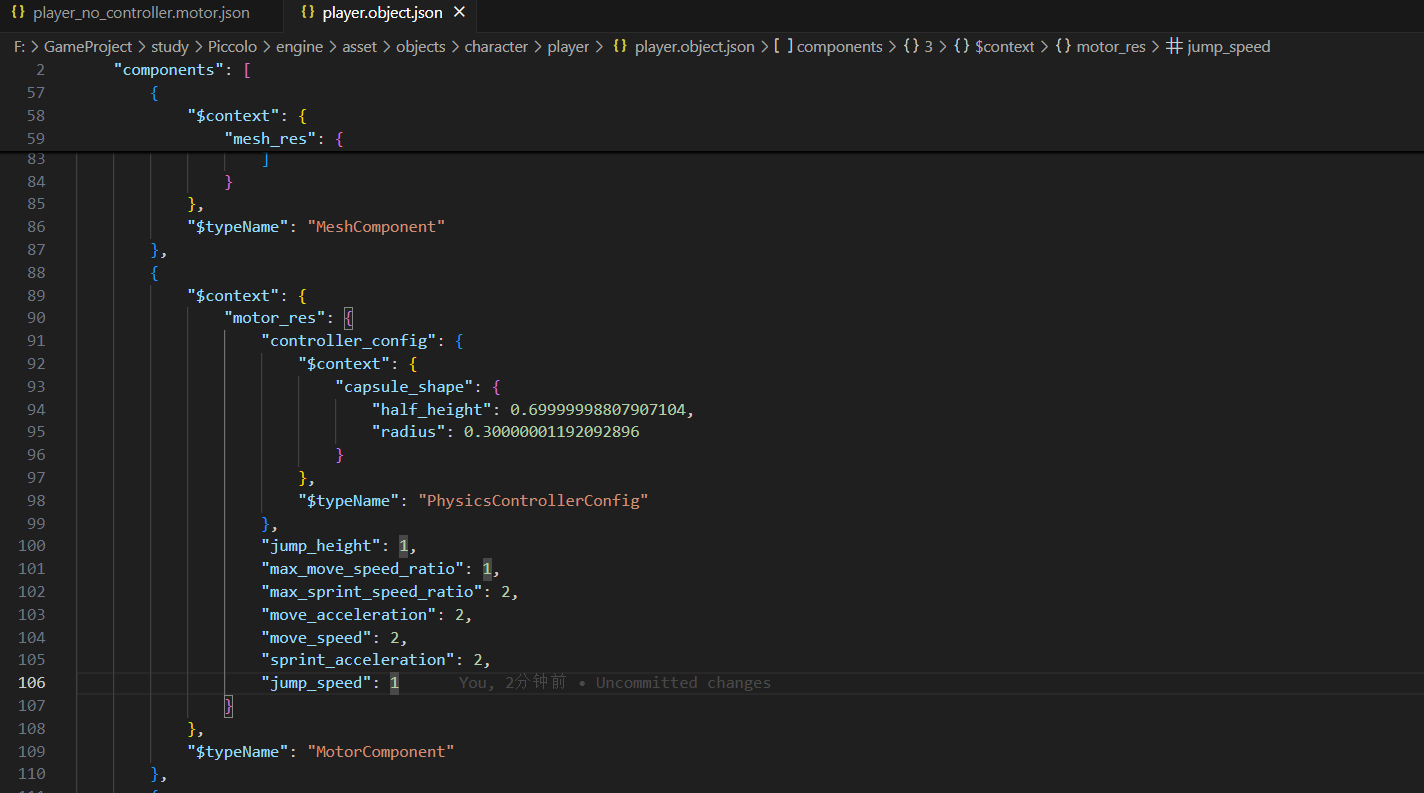
将jump_height修改为2之后,面板上还是1,确认了应该是这个原因
发现player.object.json包含上述数据,增加后运行,果然成功了,看来实际上读取的player.object.json
修改void MotorComponent::calculatedDesiredVerticalMoveSpeed(unsigned int command, float delta_time)
将m_vertical_move_speed = m_motor_res.m_jump_speed;
1
2
3
4
5
6
7
8
9
10
11
12
13
14
15
16
| if (m_jump_state == JumpState::idle)
{
if ((unsigned int)GameCommand::jump & command)
{
m_jump_state = JumpState::rising;
m_vertical_move_speed = m_motor_res.m_jump_speed;
//std::string str = std::to_string(m_motor_res.m_jump_speed);
//LOG_INFO("m_motor_res.m_jump_speed:"+str);
m_jump_horizontal_speed_ratio = m_move_speed_ratio;
}
else
{
m_vertical_move_speed = 0.f;
}
}
|
这时候使用的跳跃初速度就是设置的了,也可以在面板中修改
Ubuntu
wsl安装了20.04.06 lts
使用Windows11自带的WSL安装Ubuntu Linux系统教程-CSDN博客
win10使用wsl2安装ubuntu遇到0x80370114问题的解决方法 - 知乎
Releases · microsoft/WSL
图形mstsc连接不上,破防了,删了,还是虚拟机吧
PA01:Build and Run Pilot Engine
安装了一堆依赖,修bug,总算编译成功了
Ubuntu 20.04.3 LTS Cmake Error when running ./build_linux.sh · Issue #295 · BoomingTech/Piccolo
运行失败,关闭了几个不支持的指令集
Illegal Instruction · Issue #318 · BoomingTech/Piccolo
依旧illegal instruction,全注释了,然后segmentation..
forestlyn@Ubuntu20:/Piccolo/bin$ ./PiccoloEditor
Segmentation fault (core dumped)
forestlyn@Ubuntu20:/Piccolo/bin$ ./PiccoloEditor
Segmentation fault (core dumped)
不支持虚拟机,麻了
重回windows,这次用实验室电脑,不行不做作业了