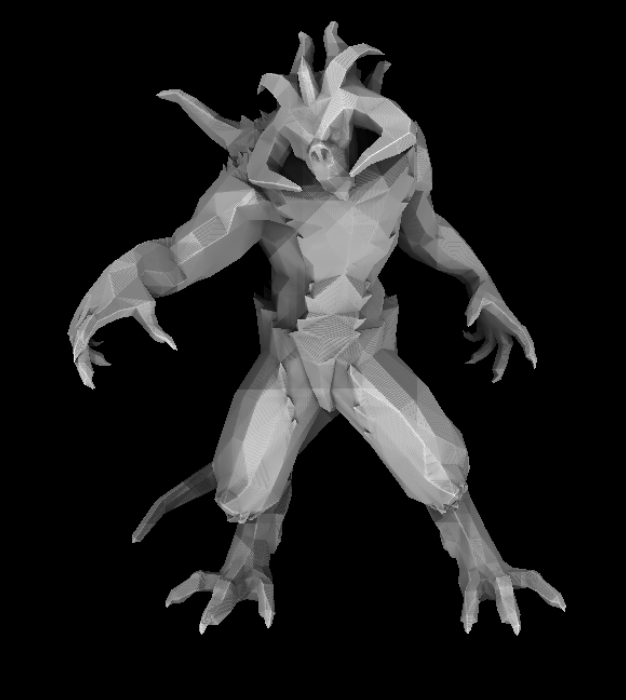
tinyrenderer学习过程记录
TinyRenderer https://github.com/ssloy/tinyrenderer/wiki
参考:
从零构建光栅器,tinyrenderer笔记(上) - 知乎
从零构建光栅器,tinyrenderer笔记(下) - 知乎
lesson1 画线 Lesson 1: Bresenham’s Line Drawing Algorithm · ssloy/tinyrenderer Wiki (github.com)
不想交换xy,于是使用maxDelta 但思路方法类似
1
2
3
4
5
6
7
8
9
10
11
12
13
14
15
16
17
18
19
20
21
22
23
24
25
26
27
28
void line (int x0, int y0, int x1, int y1, TGAImage &image, TGAColor color) int dx = abs (x0 - x1); int dy = abs (y0 - y1); int maxDelta = dx > dy ? dx : dy; int x_delta = x0 < x1 ? 1 : -1 ; int y_delta = y0 < y1 ? 1 : -1 ; int x = x0; int y = y0; int x_error = 0 ; int y_error = 0 ; for (int t = 0 ; t <= maxDelta; t++) { image.set (x, y, color); x_error += dx * 2 ; y_error += dy * 2 ; if (x_error > maxDelta) { x += x_delta; x_error -= maxDelta * 2 ; } if (y_error > maxDelta) { y += y_delta; y_error -= maxDelta * 2 ; } } }
lesson2 画实心三角形 Lesson 2: Triangle rasterization and back face culling · ssloy/tinyrenderer Wiki (github.com)
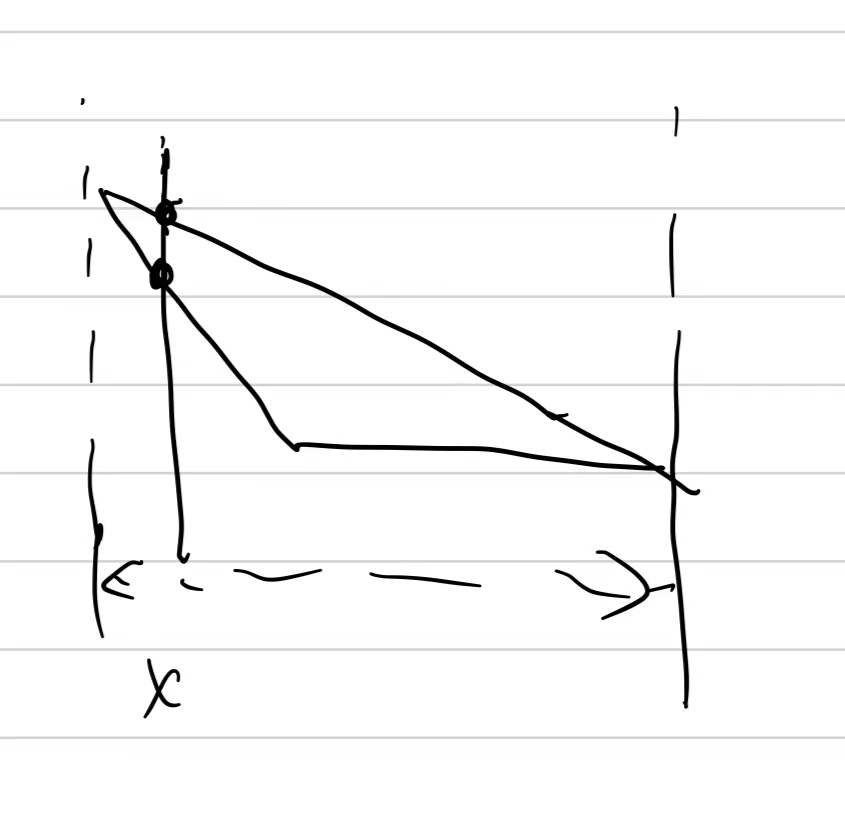
画实心三角形 思路1 思路1,如下图所示从xmin-xmax,扫描相交的两个点,再画线
1
2
3
4
5
6
7
8
9
10
11
12
13
14
15
16
17
18
19
20
21
22
23
24
25
26
27
28
29
30
31
32
33
34
35
36
37
38
39
40
41
42
43
44
45
46
47
48
49
50
51
52
53
54
55
56
57
58
59
60
61
62
63
void line (Vec2i t0, Vec2i t1, TGAImage &image, TGAColor color) line (t0.x, t0.y, t1.x, t1.y, image, color); } bool inRange (int x, int x0, int x1) if (x <= x0 && x >= x1) return true ; if (x >= x0 && x <= x1) return true ; return false ; } Vec3i calculateIntersection (int x, Vec2i t0, Vec2i t1, Vec2i t2) float dx1 = t1.x - t0.x; float dx2 = t2.x - t1.x; float dx3 = t0.x - t2.x; float dy1 = t1.y - t0.y; float dy2 = t2.y - t1.y; float dy3 = t0.y - t2.y; float y1 = -1 ; if (dx1 != 0 && inRange (x, t0.x, t1.x)) { y1 = (x - t0.x) / dx1 * dy1 + t0.y; } float y2 = -1 ; if (dx2 != 0 && inRange (x, t1.x, t2.x)) { y2 = (x - t1.x) / dx2 * dy2 + t1.y; } float y3 = -1 ; if (dx3 != 0 && inRange (x, t0.x, t2.x)) { y3 = (x - t2.x) / dx3 * dy3 + t2.y; } return Vec3i (y1, y2, y3); } void triangle (Vec2i t0, Vec2i t1, Vec2i t2, TGAImage &image, TGAColor color) int minx = t0.x < t1.x ? t0.x : t1.x; minx = minx < t2.x ? minx : t2.x; int maxx = t0.x < t1.x ? t1.x : t0.x; maxx = maxx < t2.x ? t2.x : maxx; for (int x = minx; x <= maxx; x++) { Vec3i res = calculateIntersection (x, t0, t1, t2); if (res.x == -1 ) { line (x, res.y, x, res.z, image, color); } if (res.y == -1 ) { line (x, res.x, x, res.z, image, color); } if (res.z == -1 ) { line (x, res.x, x, res.y, image, color); } } }
很奇怪,少了一条线,分析发现两端点合一时导致没有-1,因此少画一根线
修改calculateIntersection 考虑多种情况
1
2
3
4
5
6
7
8
9
10
11
12
13
14
15
16
17
18
19
20
21
22
23
24
25
26
27
28
29
30
31
32
33
34
35
36
37
38
39
40
41
42
43
44
45
46
47
48
49
50
51
52
53
54
55
56
57
58
59
60
Vec2i calculateIntersection (int x, Vec2i t0, Vec2i t1, Vec2i t2) float dx1 = t1.x - t0.x; float dx2 = t2.x - t1.x; float dx3 = t0.x - t2.x; float dy1 = t1.y - t0.y; float dy2 = t2.y - t1.y; float dy3 = t0.y - t2.y; float y1 = -1 ; if (x == t0.x) y1 = t0.y; else if (dx1 != 0 && inRange (x, t0.x, t1.x)) { y1 = (x - t0.x) / dx1 * dy1 + t0.y; } float y2 = -1 ; if (x == t1.x) y2 = t1.y; else if (dx2 != 0 && inRange (x, t1.x, t2.x)) { y2 = (x - t1.x) / dx2 * dy2 + t1.y; } float y3 = -1 ; if (x == t2.x) y3 = t2.y; else if (dx3 != 0 && inRange (x, t0.x, t2.x)) { y3 = (x - t2.x) / dx3 * dy3 + t2.y; } if (y1 == -1 ) return Vec2i (y2, y3); if (y2 == -1 ) return Vec2i (y1, y3); if (y3 == -1 ) return Vec2i (y1, y2); if (y1 == y2 || y1 == y3) return Vec2i (y2, y3); if (y2 == y3) return Vec2i (y1, y3); return Vec2i (y1, y2); } void triangle (Vec2i t0, Vec2i t1, Vec2i t2, TGAImage &image, TGAColor color) int minx = t0.x < t1.x ? t0.x : t1.x; minx = minx < t2.x ? minx : t2.x; int maxx = t0.x < t1.x ? t1.x : t0.x; maxx = maxx < t2.x ? t2.x : maxx; for (int x = minx; x <= maxx; x++) { Vec2i res = calculateIntersection (x, t0, t1, t2); line (x, res.x, x, res.y, image, color); } }
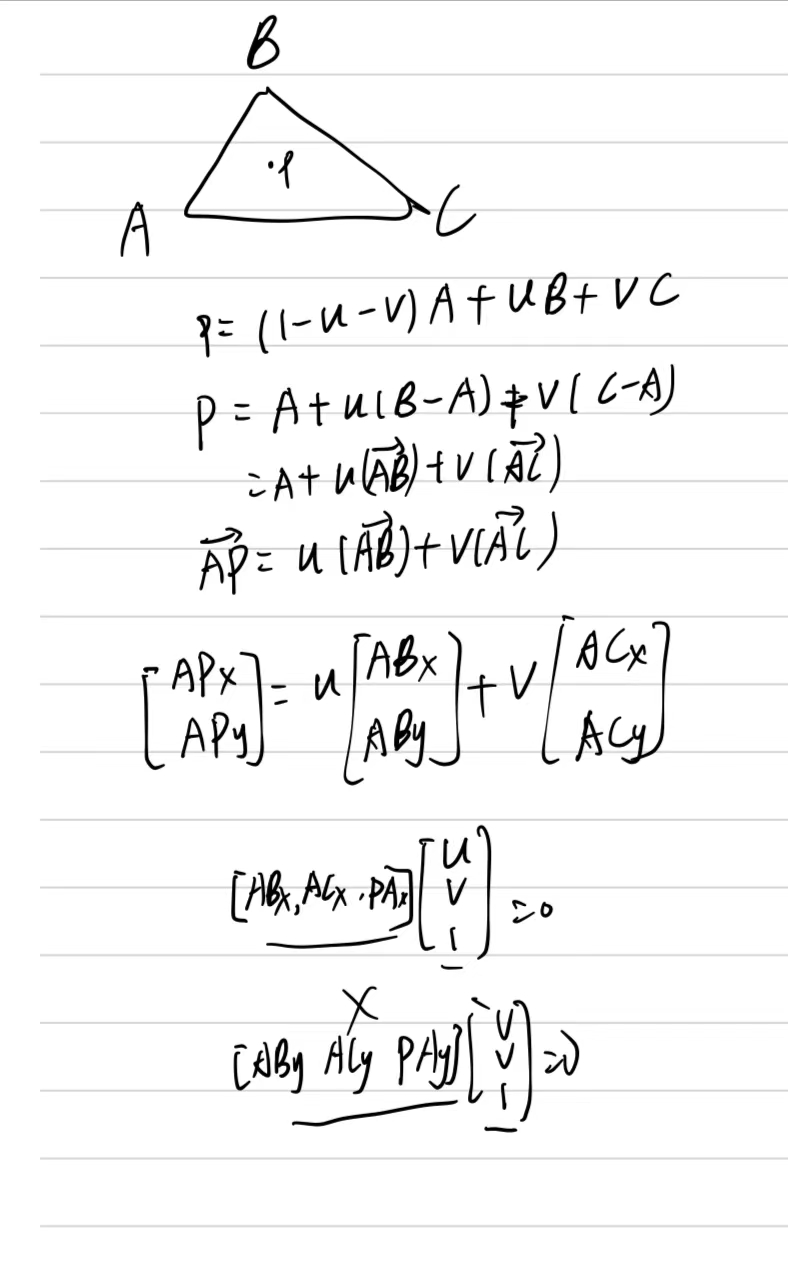
思路2 判断点P是否在三角形内,如下,叉乘获得垂直向量,再变换z=1即可
1
2
3
4
5
6
7
8
9
10
11
12
13
14
15
16
17
18
19
20
21
22
23
24
25
26
27
28
29
30
31
32
33
34
35
36
37
38
39
40
41
42
43
Vec3f barycentric (Vec2i ab, Vec2i ac, Vec2i pa) Vec3f u = Vec3f (ab.x, ac.x, pa.x) ^ Vec3f (ab.y, ac.y, pa.y); if (abs (u.z) < 1 ) { return Vec3f (1 , 1 , -1 ); } return Vec3f (1 - u.x / u.z - u.y / u.z, u.x / u.z, u.y / u.z); } Vec3f barycentric (Vec2i a, Vec2i b, Vec2i c, Vec2i p) return barycentric (Vec2i (b.x - a.x, b.y - a.y), Vec2i (c.x - a.x, c.y - a.y), Vec2i (a.x - p.x, a.y - p.y)); } void triangle (Vec2i t0, Vec2i t1, Vec2i t2, TGAImage &image, TGAColor color) int minx = std::min (t0.x, t1.x); minx = std::min (minx, t2.x); minx = std::max (minx, 0 ); int maxx = std::max (t0.x, t1.x); maxx = std::max (maxx, t2.x); maxx = std::min (width - 1 , maxx); int miny = std::min (t0.y, t1.y); miny = std::min (miny, t2.y); miny = std::max (miny, 0 ); int maxy = std::max (t0.y, t1.y); maxy = std::max (maxy, t2.y); maxy = std::min (height - 1 , maxy); for (int x = minx; x <= maxx; x++) { for (int y = miny; y <= maxy; y++) { Vec3f res = barycentric (t0, t1, t2, Vec2i (x, y)); if (res.x < 0 || res.y < 0 || res.z < 0 ) continue ; image.set (x, y, color); } } }
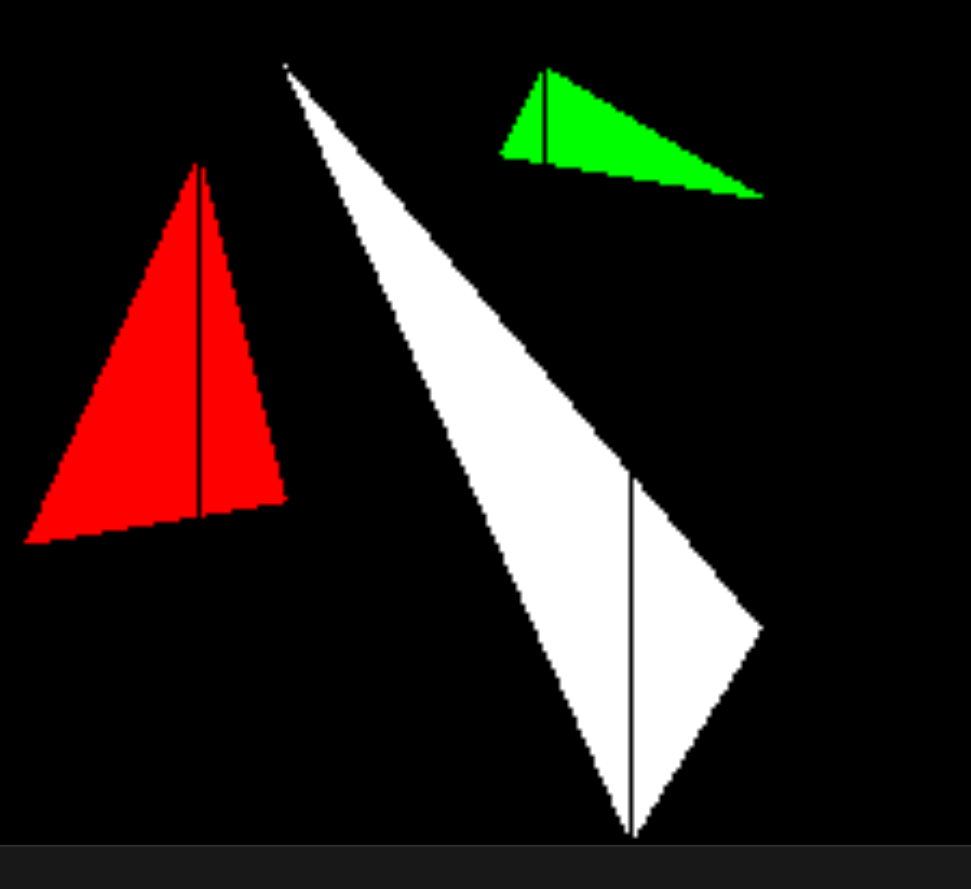
发现存在问题,有部分黑点,猜测是绘制不正确,即
思路一正常绘制
经过测试发现 先加再除!!很重要,float计算精度不够,存在误差!
1
2
3
4
5
6
7
8
9
10
11
Vec3f barycentric (Vec2i ab, Vec2i ac, Vec2i pa) Vec3f u = Vec3f (ab.x, ac.x, pa.x) ^ Vec3f (ab.y, ac.y, pa.y); if (abs (u.z) < 1 ) { return Vec3f (1 , 1 , -1 ); } if ((1 - (u.x + u.y) / u.z) == 0 && (1 - (u.x) / u.z - (u.y) / u.z) != 0 ) printf ("%.20f %.20f\n" , 1 - (u.x + u.y) / u.z, 1 - (u.x) / u.z - (u.y) / u.z); return Vec3f (1 - (u.x + u.y) / u.z, u.x / u.z, u.y / u.z); }
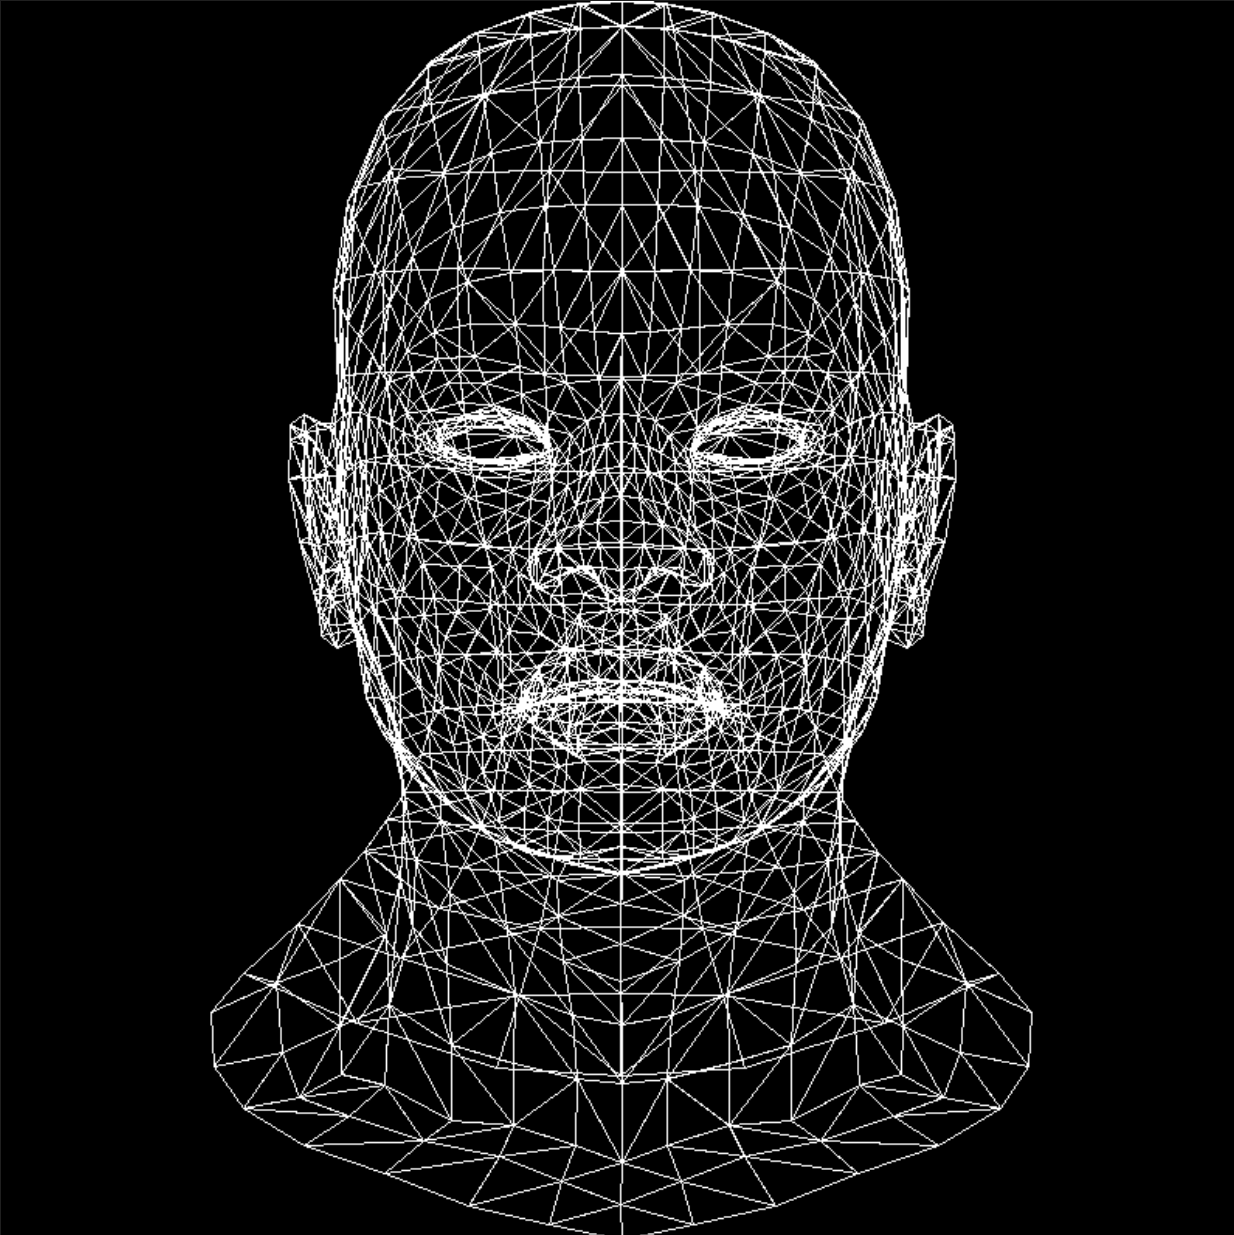
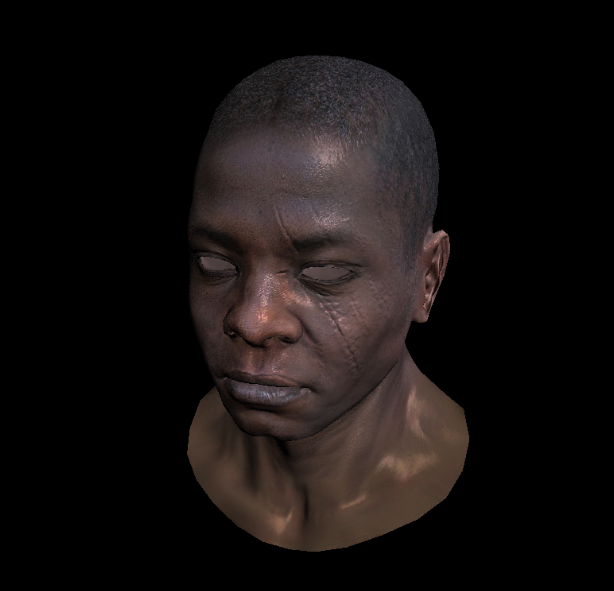
lesson3 zbuffer and texture zbuffer Lesson 3: Hidden faces removal (z buffer) · ssloy/tinyrenderer Wiki (github.com)
增加zbuffer
code:
forestlyn/TinyRenderer at debb71ba42d912866df973fc5043df151352d9f8 (github.com)
改为光线*法向量
home assignment forestlyn/TinyRenderer at db6405c70881a256852c43fd1518feff7f11e741 (github.com)
需要仔细处理model读取,vt 和对应的f坐标都没读取
同时注意uv(0,0)在左下角,而图片 0,0在左上角,所以需要flip_vertically一下将(0,0)变为左上角方便获得color
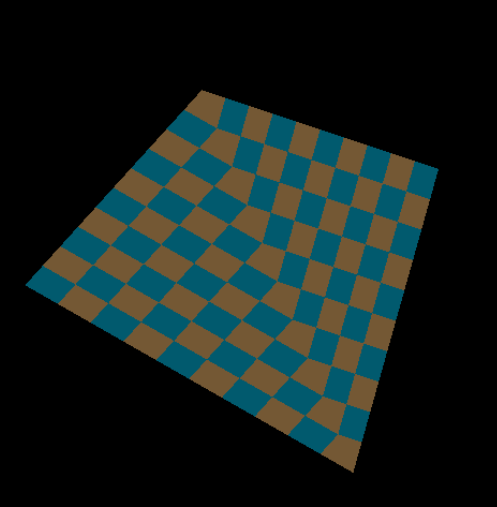
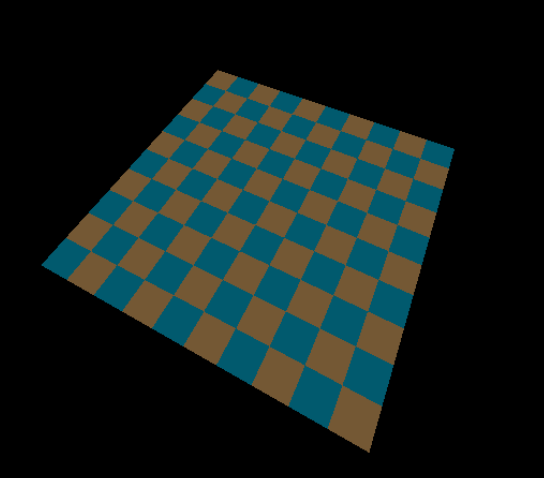
lesson4 透视投影 Lesson 4: Perspective projection · ssloy/tinyrenderer Wiki (github.com)
点v在(-1,-1,-1)-(0,0,0)之间,先进行透视投影再映射到屏幕中
渲染出奇怪的东西,zbuffer有问题
forestlyn/TinyRenderer at 635ec2cfcde3a9f10e251a6ec42e00936bdfaca1 (github.com)
发现依旧是float问题,传入triange的点x,y需要是整数,否则渲染会出现一些裂缝。。
forestlyn/TinyRenderer at 3c69a5820053aa8442f0e73e8c2a3b67b5fe7a26 (github.com)
lesson5 移动相机 Lesson 5: Moving the camera · ssloy/tinyrenderer Wiki (github.com)
实现Model to Camera View
正交矩阵逆矩阵=正交矩阵转置
1
2
3
4
5
6
7
8
9
10
11
12
13
14
15
16
17
Matrix lookat (Vec3f eye, Vec3f center, Vec3f up) Vec3f z = (eye - center).normalize (); Vec3f x = (up ^ z).normalize (); Vec3f y = (z ^ x).normalize (); Matrix subO = Matrix::identity (4 ); Matrix view = Matrix::identity (4 ); for (int i = 0 ; i < 3 ; i++) { view[0 ][i] = x[i]; view[1 ][i] = y[i]; view[2 ][i] = z[i]; subO[i][3 ] = -eye[i]; } Matrix ModelView = view * subO; return ModelView; }
forestlyn/TinyRenderer at a993af4e479153e4f27412c0507968c33d3a9870 (github.com)
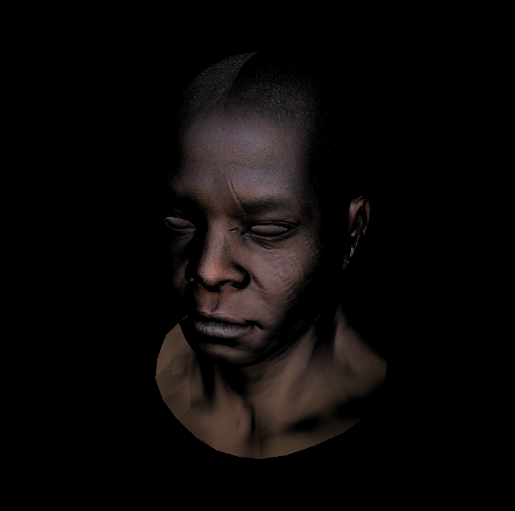
lesson6 shader 第 6 课:软件渲染器的着色器 · ssloy/tinyrenderer Wiki — Lesson 6: Shaders for the software renderer · ssloy/tinyrenderer Wiki (github.com)
重构代码过程中遇到一些错误,发现主要是坐标带来的,需要注意计算后得到的坐标除w分量,获得正确的转换坐标后,再来进行各种计算
Exercise 1: Can you tell which image is represented in Darboux frame and which one is in the global coordinate frame?
练习 1: 你能分辨出哪个图像是在达布坐标系(切线空间)中表示的,哪个图像是在全局坐标系中表示的吗?
更蓝的是切线空间
Exercise 2: Can you tell which representation is better and if yes, why is that?
练习 2: 你能说出哪种表示法更好吗?如果是,为什么?
切线空间
(22 封私信) 为什么要有切线空间(Tangent Space),它的作用是什么? - 知乎 (zhihu.com)
暂时不理解为什么都要转换XD
现在理解了:法线给的世界空间的法线XD
1
2
Vec3f n = proj <3 >(uniform_MIT * embed <4 >(model->normal (uv))).normalize (); Vec3f l = proj <3 >(uniform_M * embed <4 >(light_dir)).normalize ();
fix 透视错误 参考:https://zhuanlan.zhihu.com/p/403259571
在屏幕空间计算重心导致透视错误,需要修正
修复后
切线空间 Lesson 6bis: tangent space normal mapping · ssloy/tinyrenderer Wiki
实现切线
forestlyn/TinyRenderer at cc3aa813c403f382b8cca17af8b0b8ad34152b85
非常明显的存在锐利边缘,存在错误
破案了 修改后还用的世界空间贴图导致的😇
1
2
// load_texture(filename, "_nm.tga", normalmap_); load_texture(filename, "_nm_tangent.tga", normalmap_);
forestlyn/TinyRenderer at a7c59f59799d95bfd91e24ffb357c47b591fdd66
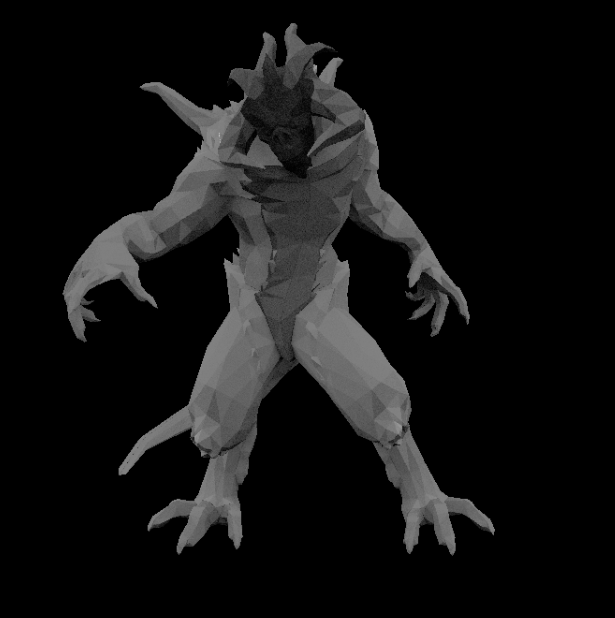
lesson7 Shadow mapping Lesson 7: Shadow mapping · ssloy/tinyrenderer Wiki
实现阴影
先按照光源所在位置计算一次zbuffer
在相机下计算实际图像,并且将点转换到光源世界下,比较z,绘制
forestlyn/TinyRenderer at 93e48d1b709a2adaa9f51accd240fbcd7f9b6340
some bug: depth设置为2000会出现,设置为200时正常,2不正常
发现是没有同步修改depth XD
1
2
int frag_depth = std::max (0 , std::min (255 , int (z / w + .5 )));int frag_depth = std::max (0 , std::min ((int )depth, int (z / w + .5 )));
增加glow 在model中增加读取glowmap,再在颜色中加glow颜色
1 color[i] = std::min<float>(20 + c[i] * shadow * (1.2 * diff + .6 * spec) + glow[i] * 10, 255);
forestlyn/TinyRenderer at 5375f1e929d0b61147f8227c6cfe38c25d2358e0
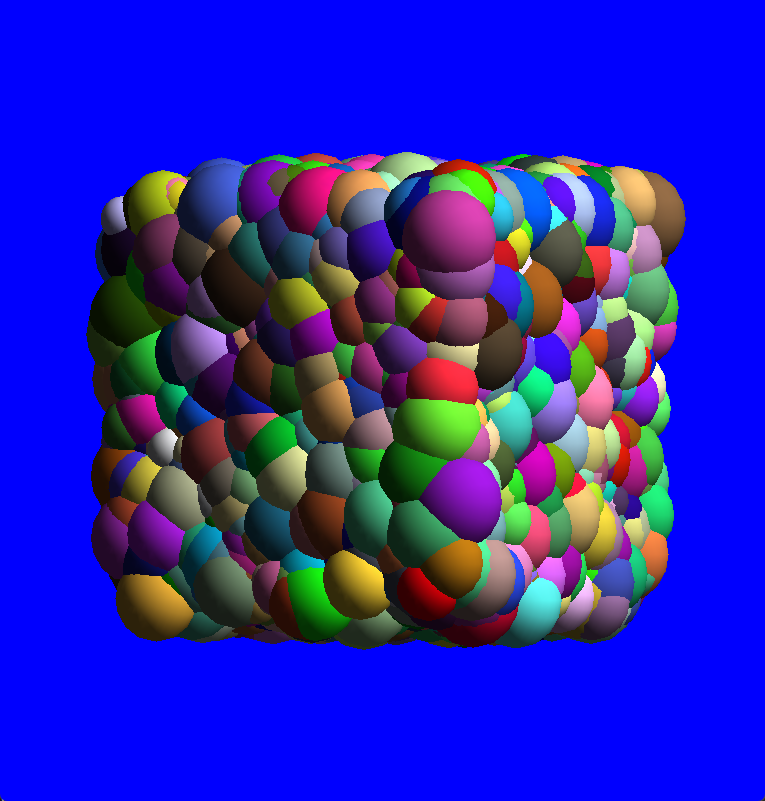
lesson8 Ambient occlusion 环境光遮挡 第 8 课:环境光遮挡 · ssloy/tinyrenderer Wiki — Lesson 8: Ambient occlusion · ssloy/tinyrenderer Wiki
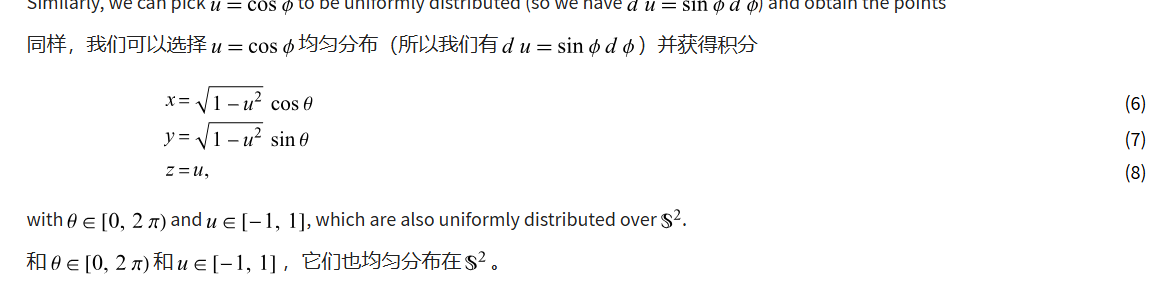
取球上点 **Question:**Do you know how to pick uniformly a thousand points on a (hemi-)sphere?
问题: 你知道如何在(半)球体上统一 选取一千个点吗?
random和z轴,x轴的夹角 (error)会聚集在两极附近
球体点选取——来自 Wolfram MathWorld — Sphere Point Picking – from Wolfram MathWorld
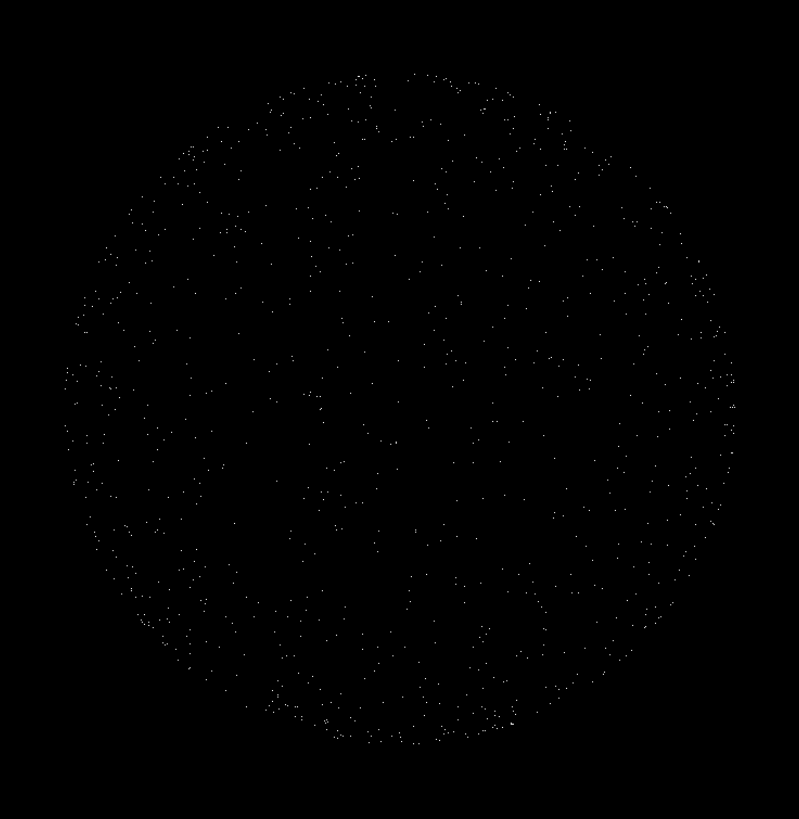
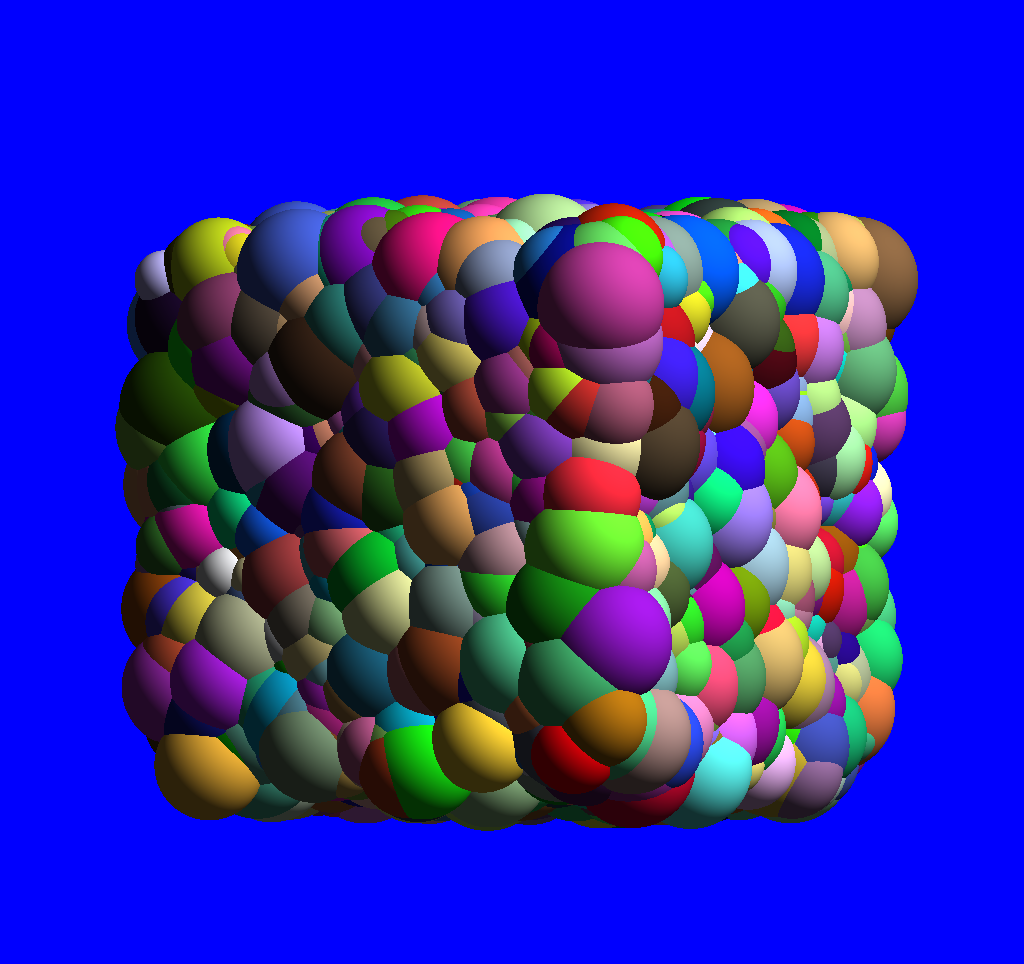
使用以下公式重新绘制,感觉画多了之后也不太均匀?
forestlyn/TinyRenderer at aa9e960792e853be4ce215430f4fc10ef6379256
fix draw sphere bug 破案了,原来是画了第一个不对的之后忘记clear了
forestlyn/TinyRenderer at c7af07962275f49da0510a6d23f5650aa5569d3a
https://cdn.jsdelivr.net/gh/forestlyn/Drawing-bed/blog/image-20250114220743083.png
修改IShader 对于片元增加传入屏幕坐标
不修改绘制三角形,于是修改了一下zshader
注意:原本传入的是屏幕坐标,作者在这一部分改成传入【-1,1】范围坐标,未×ViewPort
本人懒得改,于是选择修改zshader
1
2
3
4
5
6
virtual bool fragment (Vec3f gl_FragCoord, Vec3f bar, TGAColor &color) float z = bar * varying_tri[2 ]; color = TGAColor (255 , 255 , 255 ) * ((z + 1.f ) / 2.f ); return false ; }
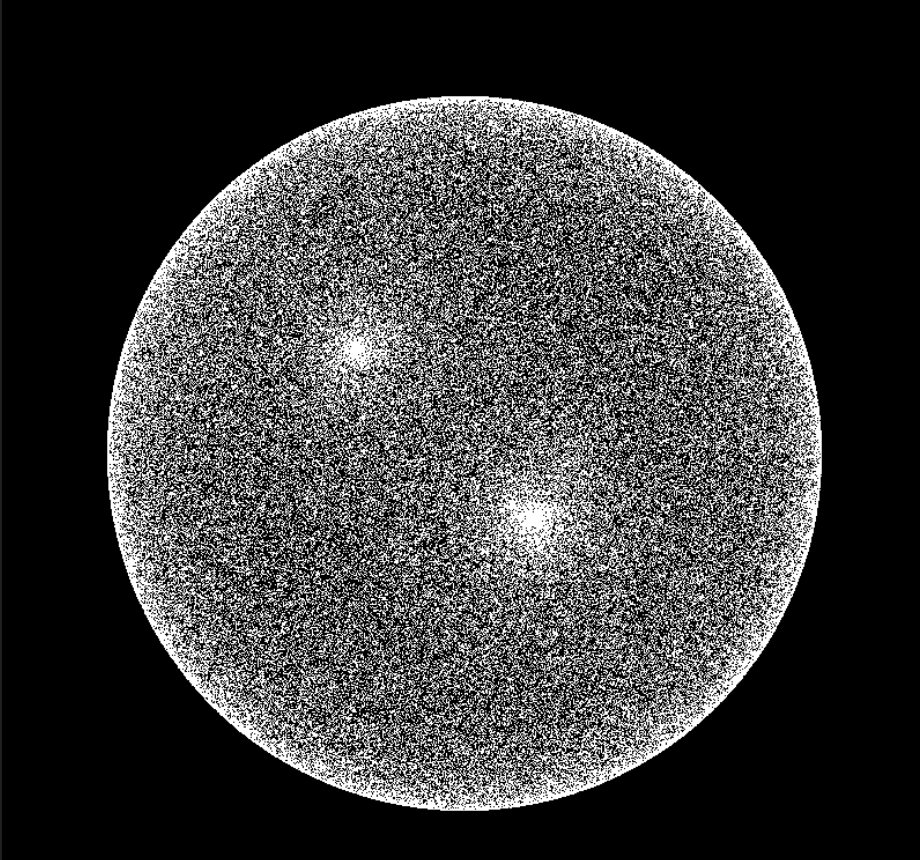
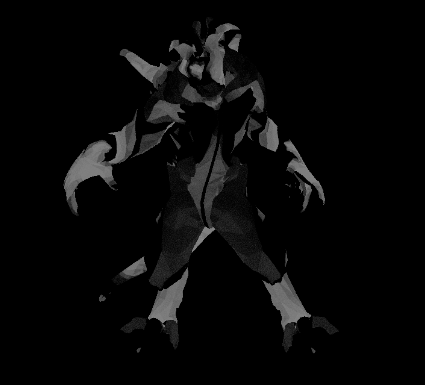
occl如上图所示,Vscode的TGA Image Preview看不了GRAYSCALE图
forestlyn/TinyRenderer at 09aabfbab73754d984df31fd7edd06063b6e9e42
还以为错了,结果ps打开就能看到。😢
注意由于total公式iter从1开始
1
2
3
4
5
6
for (int iter = 1 ; iter <= randomPointsNum; iter++){ ...... total.set (i, j, TGAColor ((tmp * (iter - 1 ) + occl.get (i, j)[0 ]) / (float )iter + .5 f)); }
Question: Why are there holes in obviously visible triangles?
问: 为什么明显可见的三角形里有洞?
guess: 有的地方看不到所以有洞(?错误,不管深度测试是否通过都画出来也有洞
因此猜测是透视时部分点被舍入导致有洞,即
假设:uv对应100100个点的区域透视到屏幕空间只有50 50的大小,于是进行三角形绘制只画了50*50个点,返回对应uv画回去,导致有洞(猜测不知道对不对)
进行一下验证,对于uv*1024点画图
test:进行绘制测试,不管深度进行绘制
1
2
3
4
5
6
7
8
9
10
11
12
virtual bool fragment (Vec3f gl_FragCoord, Vec3f bar, TGAColor &color) Vec2f uv = varying_uv * bar; if (std::abs (shadowbuffer[int (gl_FragCoord.x + gl_FragCoord.y * width)] - gl_FragCoord.z < 1e-2 )) { occl.set ((int )(uv.x * 1024 ), (int )(uv.y * 1024 ), TGAColor (255 )); } occlTest.set ((int )(uv.x * 1024 ), (int )(uv.y * 1024 ), TGAColor (255 )); color = TGAColor (255 , 0 , 0 ); return false ; }
画100次出来occlTest如下所示,也存在洞
Question: Why are there triangles more densely covered than others?
问题: 为什么有些三角形比其他三角形覆盖得更密?
可见性(?
根据occlusion绘制 forestlyn/TinyRenderer at b01c8adef16e8ab19b51b65e1802a331d33c9c2c
画出来显示有些奇怪
需要反转一下图片XD
forestlyn/TinyRenderer at 20430cceea2bafa1e2b10a1817ee1e6a2b498c24
使用梯度计算 计算八个方向梯度来计算颜色,计算pow=1时
pow=5
有些奇怪,就这样了
forestlyn/TinyRenderer at 6ca9796c3d9ca7b8a97a0b27311b9c4d2ddf5849
lesson9:Real OpenGL (GLSL) application 安装一下包
Win10 + VSCode + GLUT 配置 - cralor - 博客园
把glut.h移动到文件夹下
make报错
1
2
3
4
5
6
7
8
9
10
11
12
g++ -Wall -o ./main main.o -lm -lGL -lglut -lGLU F:/install/Mingw64/mingw64/mingw64/bin/../lib/gcc/x86_64-w64-mingw32/8.1 .0 /../../../../x86_64-w64-mingw32/bin/ld.exe: cannot find -lGL F:/install/Mingw64/mingw64/mingw64/bin/../lib/gcc/x86_64-w64-mingw32/8.1 .0 /../../../../x86_64-w64-mingw32/bin/ld.exe: skipping incompatible F:/in::/inst::::::::::::/install/Mingw64/mingw:/install/Mingw64/mingw64/mingw64/bin/../lib/gcc/x86_64-w64-mingw32/8.1 .0 /../../../../lib/glut.lib when searching for -lglut F:/install/Mingw64/mingw64/mingw64/bin/../lib/gcc/x86_64-w64-mingw32/8.1 .0 /../../../../x86_64-w64-mingw32/bin/ld.exe: skipping incompatible F:/install/Mingw64/mingw64/mingw64/bin/../lib/gcc/x86_64-w64-mingw32/8.1 .0 /../../../glut.lib when searching for -lglut F:/install/Mingw64/mingw64/mingw64/bin/../lib/gcc/x86_64-w64-mingw32/8.1 .0 /../../../../x86_64-w64-mingw32/bin/ld.exe: skipping incompatible F:/install/Mingw64/mingw64/mingw64/bin/../lib/gcc/x86_64-w64-mingw32/8.1 .0 /../../../../lib/glut.lib when searching for -lglut F:/install/Mingw64/mingw64/mingw64/bin/../lib/gcc/x86_64-w64-mingw32/8.1 .0 /../../../../x86_64-w64-mingw32/bin/ld.exe: skipping incompatible F:/install/Mingw64/mingw64/mingw64/bin/../lib/gcc/x86_64-w64-mingw32/8.1 .0 /../../../../lib\glut.lib when searching for -lglut F:/install/Mingw64/mingw64/mingw64/bin/../lib/gcc/x86_64-w64-mingw32/8.1 .0 /../../../../x86_64-w64-mingw32/bin/ld.exe: skipping incompatible F:/install/Mingw64/mingw64/mingw64/bin/../lib/gcc/x86_64-w64-mingw32/8.1 .0 /../../../glut.lib when searching for -lglut F:/install/Mingw64/mingw64/mingw64/bin/../lib/gcc/x86_64-w64-mingw32/8.1 .0 /../../../../x86_64-w64-mingw32/bin/ld.exe: skipping incompatible F:/install/Mingw64/mingw64/mingw64/bin/../lib/gcc/x86_64-w64-mingw32/8.1 .0 /../../..\glut.lib when searching for -lglut F:/install/Mingw64/mingw64/mingw64/bin/../lib/gcc/x86_64-w64-mingw32/8.1 .0 /../../../../x86_64-w64-mingw32/bin/ld.exe: cannot find -lglut F:/install/Mingw64/mingw64/mingw64/bin/../lib/gcc/x86_64-w64-mingw32/8.1 .0 /../../../../x86_64-w64-mingw32/bin/ld.exe: cannot find -lGLU collect2.exe: error: ld returned 1 exit status make: *** [Makefile:14 : main] Error 1
整了半天没解决,干脆安装MSYS2 — MSYS2 的mingw make 设置环境变量等
pacman -S mingw-w64-x86_64-freeglut
成功了
shader:glsl 简单的shader
forestlyn/TinyRenderer at 6ed21076a655211a97568ecb7131f324cdbd45ba
使用shader加快绘制正交投影 forestlyn/TinyRenderer at d3b34fddf9914cceaaf84b27c84c37ec0e01f64e
感觉比较难理解的是frag.glsl
1
2
3
4
5
6
7
8
9
10
11
12
13
14
15
16
17
18
19
20
21
22
23
24
25
26
27
28
29
30
31
32
33
34
35
36
37
38
39
#version 120 uniform vec4 viewport;varying float radius;varying vec2 center;void main(void ) { vec2 ndc_current_pixel = ((2.0 * gl_FragCoord .xy) - (2.0 * viewport.xy)) / (viewport.zw) - 1 ; vec2 diff = ndc_current_pixel - center; float d2 = dot (diff, diff); float r2 = radius * radius; if (d2 > r2) { discard ; } else { vec3 l = normalize (gl_LightSource [0 ].position.xyz); float dr = sqrt (r2 - d2); vec3 n = vec3 (ndc_current_pixel - center, dr); float intensity = .2 + max (dot (l, normalize (n)), 0.0 ); gl_FragColor = gl_Color * intensity; gl_FragDepth = gl_FragCoord .z + dr * gl_DepthRange .diff / 2.0 * gl_ProjectionMatrix [2 ].z; } }